Saturday, February 13, 2016

bathroom vanity mostly done

too busy to make interim fotos because the kitchen/bath remodel takes a lot of time. here's the bathroom vanity, ready for install. Overall dims are 48"wide, 20" deep, 32" high.

I will place a large drawer behind a frame-panel facade under the sink once the sink is dropped into place and plumbed. The back of the drawer box will have to clear the P trap from the drain, so I won't be doing this until we're installed.

The whole assy will be floated on a 4" floor kick leveling frame once we get down to the baseboards. I will have to coordinate with the tile guy on what he wants to do with regard to the interface.

The box is made of maple ply, edged with reclaimed fir. the drawer fronts are 3/4 fir veneer ply with reclaimed fir edge banding. Blum 563 slides. baltic drawer boxes using 1/2" finger joints.

I'm trying Minwax Water based gloss polyurethane brushed on. Not the nicest finish but it should be pretty durable and good enough for the bathroom, right?

PS, the drawer pulls are still in development as I humm and haww my way through more iterations. So in the tradition, my interim pulls are blue masking tape.

Saturday, January 30, 2016

how about this drawer handle

overall length is 2,1/2", 1" deep, 7/8" high. Birch, done with a 3/4 straight cut router. Mind you this is going on shaker style drawer fronts.

Sarah likes them but i duno.

Saturday, January 2, 2016

kitchen remodel part 0 - island cabinets

Our little North Oakland bungalow from 1911 will have some hefty work done on the kitchen and adjacent jack/jill bathroom in the coming months. Small movements of one wall in the bath will give much needed elbow room. We'll raise the ceiling to its original 108" height and improve the overall flow of the kitchen cabinet/storage.

Cabinetry will be done in my shop, as much as possible in advance to reduce the downtime and save $. Cabinets will mostly be done euro-style using prefinished birch ply, however we're going to continue to use a kitchen "island" benchtop, using a narrower, but wider top.

for reference, here's the original kitchen. island here is 30"x60". We'll do something much longer and narrower at 24"x96"

The new island will have two lower cabinet units which will be made in frame/panel style. Posts are 2,1/4x3". rails are 9/8". Used vg fir ply for panels.

Note above you can see a stack of 1/2" boards on teh tablesaw calming down after an initial milling. These are alderwood from my mom and dad's farm that my dad shipped to me a few years back. much of this wood had been infiltrated by boring insects, however I figured they had been gone. Only after I had milled all the drawer parts to final thickness did I notice some larvae still soft to the touch of my pocket knife. Much sorrow was expressed at this point. It's Alderwood from a wind storm that took down a large swath of trees on mom and dad's farm, and I wanted to use this wood somewhere important, and now it's been spoiled by the bugs. I'll set these boards aside for now. Heat kills them but I don't have the time now to bring everythign up to 150F in my kitchen oven.

I'll use Russian birch ply as drawer boxes for now.

Below, an initial frame test fitment. Double tenons for each rail that I will then reinforce with a 3/16" oak dowel for belt-suspenders treatment.

Milling down reclaimed ship-lap fir for the rails, laminating up the posts, too.
I use the cabinet maker's triangle to help me orient all the pieces. all the tenons were cut using my bandsaw and so there was some regularity to the layout. I also used my drillpress to beaver out most of the mortises, while using my 13mm japanese chisel(the only one so far that's sent me to the ER) to take care of the rest of the waste

Reclaimed wood means pulling nails. Sometimes nails that had been sheared off by an infernal sawzall

My first japanese paring chisel from Hida Tool off S. Pablo Ave. really helpful in getting my mortises dialed in.

Sunday, November 29, 2015

more drawer pulls: "give it a yank, hank"

Ralph from the Accidental Woodworker web log, plus my buddy Tom Waits in Niwot, CO both liked the curved pull from my last post which is valuable feedback, thank you. Tom also suggested trying to size these things a bit smaller and see how that fits ("20-30 percent. A jockey full of bourbon ought to still be able to find it...").

well i got fairly big mitts, so i'm given to larger grab bars and handles and usually the XL gloves in the hardware store. Still there's always room to try that out, even if the turkey needs immediate internal temperature reading and your thermometer is buried deep inside drawer number 2. what size handle does that mean?

Here are 3 tries: 3" 3,1/2" and 4" long.

It is surprising how different it is to hold on to one from the other. The smallest one might be just fine. I've attached these and others to various cupboards and drawers in the kitchen to see how they feel for us over the next few weeks.

The bigger one might be most appropriate for something like a pantry or laundry door. Too big for smaller drawers.

I also think how these things are finished will affect the feel a lot. I've just got 'em sanded to 120grit. but imagine if they had a lot of poly on them. Then there's the other idea of using a hard wood like maple, or mesquite. Also, have to consider painting these, which could be really cool little dollups of color on a natural wood panel finish...

Also tried afew of the blockier style as well, in various positions and pairs in cupboards and drawers.

Saturday, November 28, 2015

afternooner project: couple neo-schwarz saw benches from scraps

2 4' long 4x6 rough-cut pine timbers, plus several odd lengths of 2x4 pine were used to protect the outside of my hammer a3-31 planer/thicknesser on arrival months ago. i pulled the nails and random fasteners from these sticks and set them aside thinking this wood might be useful some day.
So with an afternoon spinning wheels, i decided to practice surface prepping these boards on teh planer, then busting out a few saw benches, ala c.schwarz. I actually used two of his blog entries in this project which has to be a record for me. Went with the $5.87 design he posted here

I also used a technique to help scribe the bottom to the floor by turning the benches over and using a reference off a flat surface to define the height. Here it is

These came out to be about 18,1/2" high which is also a good shop stool height. bonus. Honestly i'm not sure how much hand sawing I plan on doing with these benches but they are going to be really handy while staging boards during various stages of their milling process. also a good height to post something like a cabinet when I need to apply finish, or hardware etc. Today I used them to brake down a pallet languishing next to our house using both a circ saw, and a pull saw. these were a perfect height for this sort of adventure.

in total, a productive way to spend a few spare hourse in an afternoon.

Friday, November 27, 2015

more drawer pulls

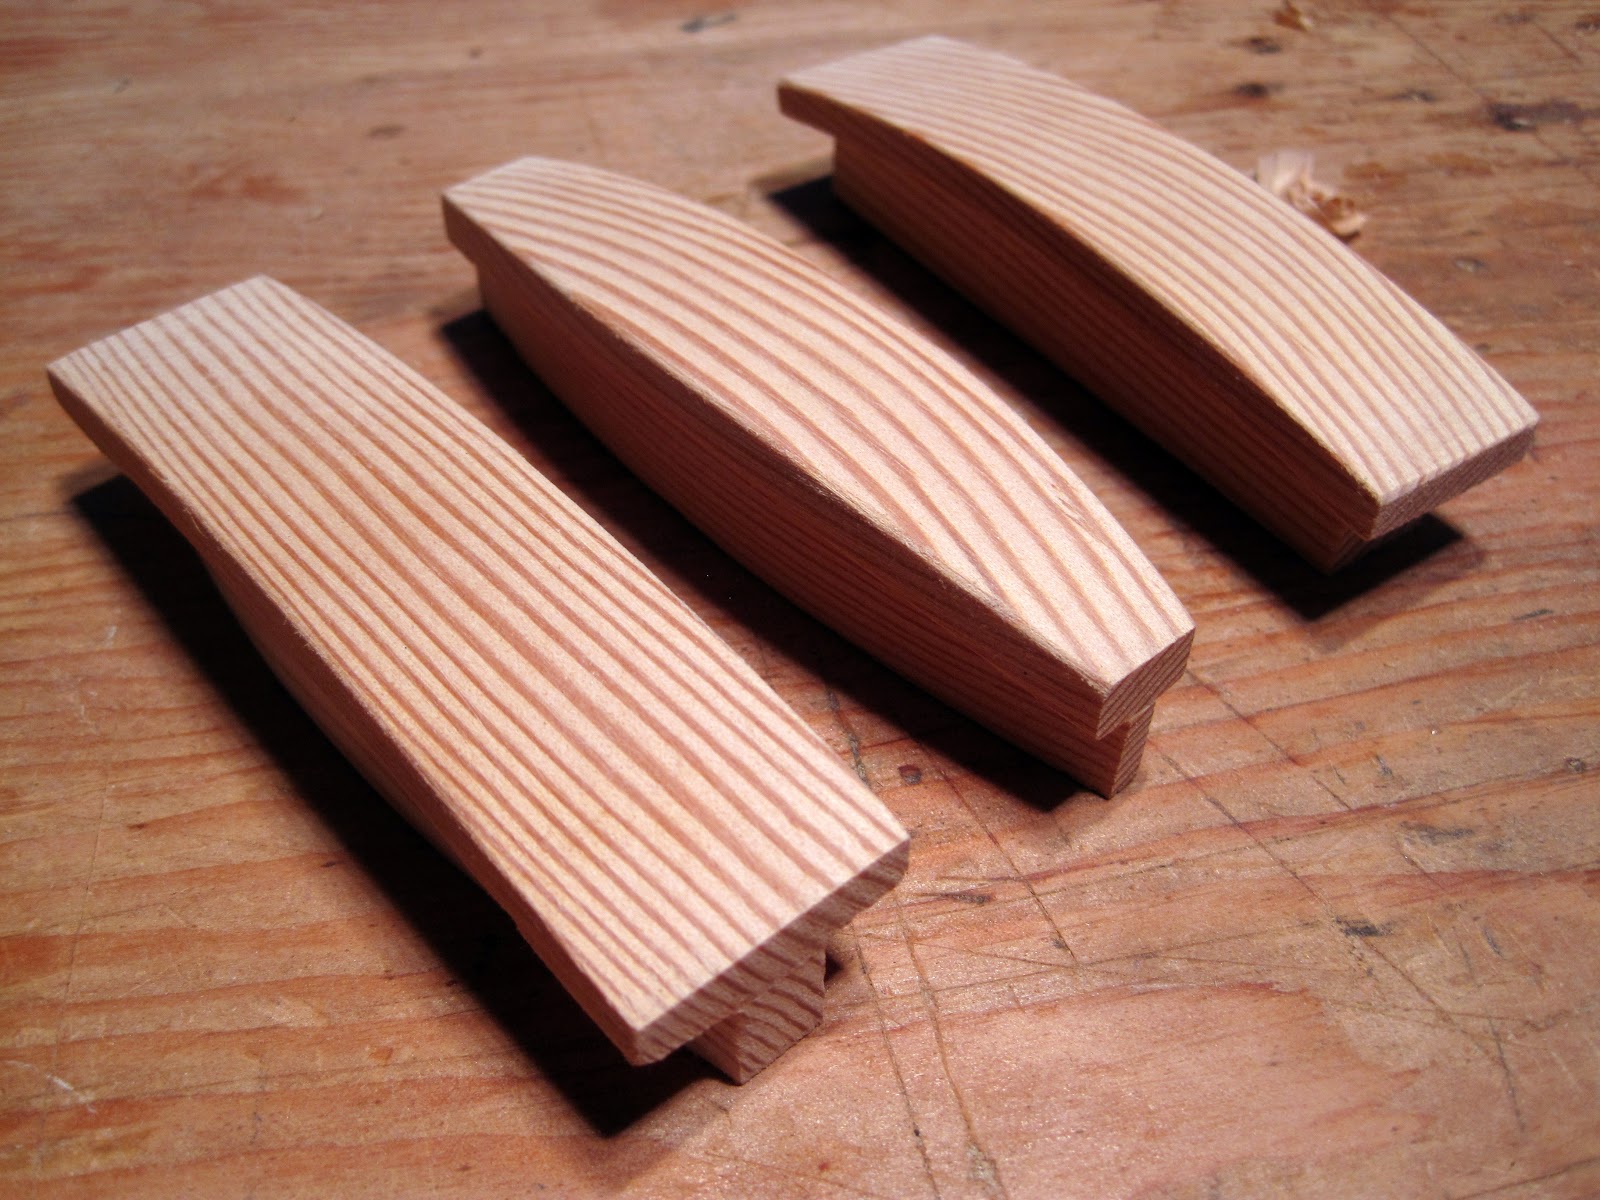
I ran the earlier designs from couple days ago by sarah, she liked and also suggested trying one that is symmetrical about the long axis. Good idea, especially if you want to arrange these things in a horizontal or vertical orientation along that long axis. here are a couple more tries, using the same basic radius cutting assy. for the band saw.

Wednesday, November 25, 2015

making several dozen drawer pulls

With a kitchen and bathroom remodel, plus some other built-in work for the house, I wanted to come up with a drawer pull that I could make in batches with some help from my machines. at the same time, i wanted a pull that would not look too machine-made with right angles and square ends. I wanted it to be curved and be nice to reach for and easy to use. Drawer pulls are extremely difficult for me for some reason. Most of my attempts in the past have felt clunky, looked awkward. Hands are complicated, picky things!

Here's my latest attempt. These are PROTOTYPES made from 1x1" fir, 4" wide. I still need to figure out how to do the pilot holes and might have to make a separate jig to hold them in place:

This is based on a plan I did earlier this year for shop cabinet pulls, all done on a table saw and finished up with a few quick passes of sandpaper and then water-poly

I wanted to machine an overhanging lip because this felt really comfortable on the fingertips when met with my thumb. really easy to pull this without feeling awkward. However...it's very blocky for in the house, so off i went looking into machining wood using screaming router bits and holders. but that translates into lots of adrenaline and frightened shop cats.

I then recalled some youtube videos of folks making very nice circle cutting jigs using their band saws and the a-ha moment occurred. Why not try jigging up using the bandsaw as my cutting tool?

TO date, this has been the most complex jig i've done up, and it was very ad-hoc. what you see here is a 1/2" ply base, clamped to the bandsaw table, and a sled that rides on top, with a 3/8" oak dowel pivot point set back at 9". I have two stop blocks for the sled that go between the base, and the fence of the saw. Take one swipe with block #1, and then switch in block #2 and take another pass. this leaves the plan view curve with overhang. I will then rip the interior piece about 1/4" thinner than the overhang, and then glue the pieces back together.

You can see the other ones resting on the side to the left. I actually took this pic after the first cuts were made so that you can see how they would fit together after being glued up. not sure if this makes any sense.

antother thing in this pic is a little piece of wood with some 80 grit paper glued to it. very important! this is what i use to hold the piece down to the jig while i make the pass. it holds really well and i felt in total control when performing this operation.

I also wanted to do a second pass on the pieces once their glue had dried to have a gentle radius along the elevation view. I used a larger radius here on the saw, also i shimmed the place where the pieces sat so that there was a gentle outward taper.
Here, i'm trying them out on the old cabinets on our kitchen. no better way to test them out than to have them in place for us to get a feel for 'em, right?

I tried two pulls on the drawer, too. Since i'll be using mechanical slides for the new cabinets, i dont think it's necessary to have two pulls, and looks a bit cluttered actually.