Today's agenda involved crest rails and arm rails. another full day of riving, and draw-knifing at the shaving horse, followed by steam bending of these pieces to their final curved shape. I don't think any of us students had done steam bending, and it comes on at the end of the day after putting all this work into making as best we could pieces of continuous grain dimensioned to the appropriate shape for the process.
This morning we jump in the deep end with riving the longer rails. It's different than riving spindles as there is more than twice the distance to split and you must be open to the feedback that the wood is giving you. I managed to catch this sequence of photos of curtis riving out 2 armrails from one blank. Notice how he's placed the "heavier" piece towards him in the brake. the froe's handle is always turned towards him to encourage the split to move more towards the heavy side and keep the split dividing the pieces evenly.


here's a good trick i tried to capture, but not as clearly as i would like. Curtis is using the non-froe hand to pinch the lighter side towards the heavier one. This also helps prevent the split from wandering. also notice how he's standing on the edges of the brake boards. This is an activity that develops head to hand, to foot coordination.
And here are the roughed out pieces cut to length and ready for the shaving horse. Once again, we work the radial plane to continuous grain surface, then a tangential plane, scribe to thickness on opposing sides, and repeat.
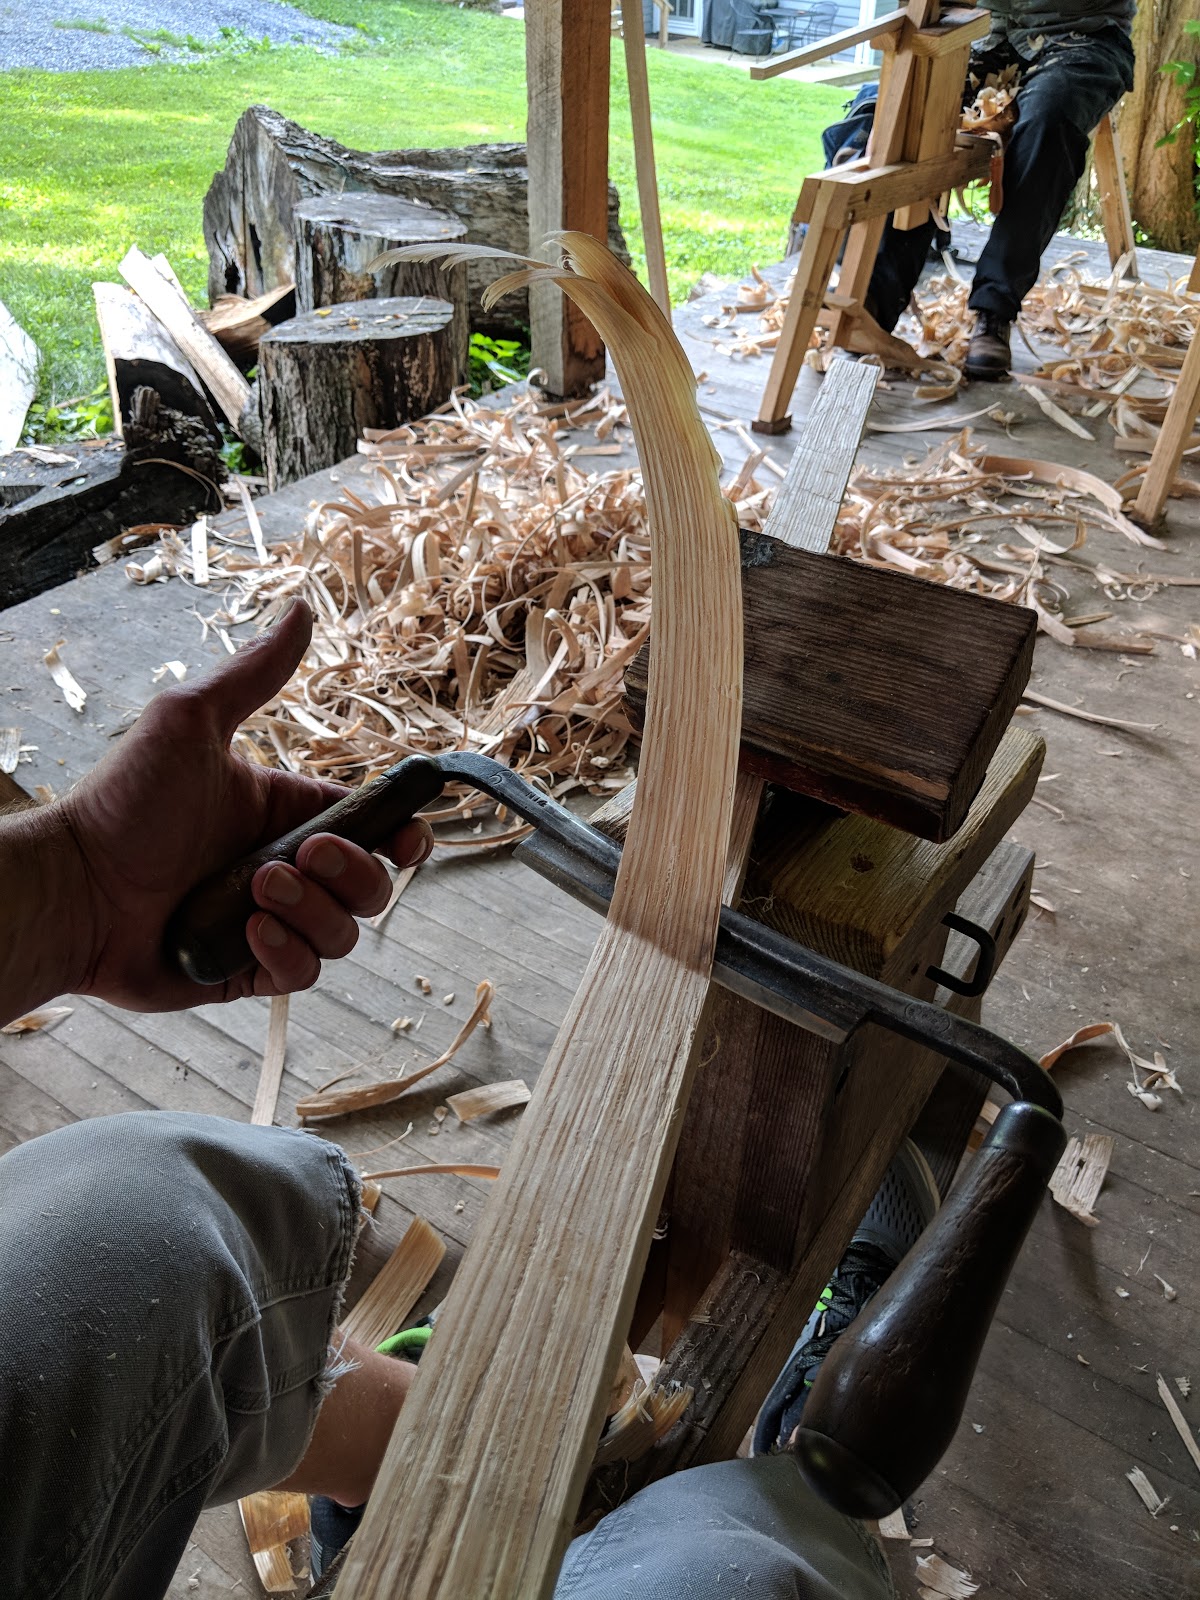
I'm trying to capture here what it's like to pull a drawknife
with the grain. As a cabinet woodworker primarily, i'm used to dimensioning stock to machine flatness and squareness on all sides. You need to just put that thought away at the shave horse. Here, your strongest wood runs with the grain whereever it wanders. This reduces the chances of grain "runout" which will not work in a bent piece like a crest rail. You need the grain continuous thorughout the piece and rely on the steaming process to bend the piece into shape.
So here, i've found using less hand force to pull the drawknife through helps me. I try to relax my hands. even take a deep breath and exhale while working with the pull strokes. I know that sounds corny, but it is helpful!
Here's the crest rail taken down to square thickness.
Next is to produce an octagonal cross section, that narrows to a 3/8" at the tips. Curtis has a great, great trick to make that happen.
finally we get to apply spoke shaves to this piece to make it round-ish. You then decide on the best direction to bend this guy into a "U" shape. It's not obvious what the best way is to bend it considering the radial and tangential planes. then there's the natural bend of the grain expressed in the wood. Here you see a crest rail that had been bent from some earlier project in curtis' studio. We used a plywood jig which will be shown below to create the bends.
I unfortunately was too engrossed in the process of making the arm rails to take a photo. It was very intense and i made a few mistakes that curtis was able to advise on how to correct and we got them done.
Regardless, let us proceed to late in the day with STEAM BENDING!!!! THis is Curtis' steaming rig, a plywood enclosure wiht a pair of Wagner Power Steamers hooked in.


I know the expression is usually used in the complimentary side, but today, this was my
FIRST RODEO in steam bending! It is a very sober environment when this process ensues. You have very hot steam, a small timeframe for applying your bends, and all of the forming jigs and attendant wedges/pegs need to be
mise en place.
What is great about the experience is that you have a couple other equally vested students to help you drive the pegs and wedges into place. Curtis was there, but like a great teacher, I think he just instinctively knew to let us execute most of the bending work with our own hands, after demonstrating the process to us himself. Good teachers know when to step in and apply some reinforcement, and when to just step aside and let us learn.
We all came through on the other side with rails that are well serviceable and can continue tomorrow into the next phase of the process.
While we were steaming our rails, we layed out our seat blanks using Curtis's drawings. these are produced by a draftsman that Curtis works with. and they are full scale on mylar (i think that's the material).
Now, there are about 8 million things to keep in mind when laying out a seat: which way the grain is running, which way the bark side faces, which way the cathedrals point, grain direction at the locus of the pummel. these are some intimidatingly gorgeous full thickness slabs of pine that Curtis has arranged for us students to work with.
I will do my best and be thankful that i've been presented with a piece of pine wider than anything i've ever seen milled.
Both Curtis and Student Mark have worked in house carpentry. Today's fun fact was a carpenter's trick for laying out a perfect circle with a steel carpenter's square, using two nails. Can you guess how this was layed out?


Very nice right up.
ReplyDelete