Sunday, October 18, 2015

Emmert Pattern Maker Vice Repair & Install

Well, vice trim handle has been repaired, and here it sits parked on my bench ready to receive a leather lining I suppose. This is a fantastic vice. I tried just holding a small piece of wood and the jaws clamped sure and strong, no racking. Smelled of gorgeous old cast iron, perfumed with WD-40 and a bit of tarting up the threads with some synthetic grease

I think I need to make a new handle for this guy, something that I'd cut from a stick of fir.

Good times!

I'd like to start this with an opening email from Richard Dittenberger, a colleague of my dad's that goes far back, college? Highschool? On offer was an original Emmert's Patternmaker's vice, but this one with some particularly interesting history. Richard's grandfather worked from a very early age as a patternmaker, and had a long term working relationship with Jim Kirby, the fellow who takes credit for inventing the modern clothes washing machine. Richard's grandpa helped make that spiral thingie that agitates your clothes in the washing machine. How cool is that!??

Hello Adam, The acid test of good Mexican food is a good chili relleno. The acid test of a good woodworker is if he or she knows what an Emmert patternmaker vise is. Needless to say, you passed! I have here in Arlington a very early model of an Emmert vise, 5 inch high jaws mfg Apr 11, 1905, Pat Aug 1911. It is entirely different from the later model which is shown on the internet and in the installation instructions in the link below (PDF). It came out in 1919 which is the model that is in my mother's house mounted to a huge bench in the basement. It has six inch jaws.

My paternal grandfather Joseph Dietenberger was 16 years of age in 1900 and apprenticing as a patternmaker in shops in Cleveland. Many people brought drawings into these shops, mostly inventors, to have wood patterns made for later metal casting.

One particular inventor by the name of James Kirby brought many drawings to a shop where my grandfather worked. To make a short story long, Jim Kirby always asked that Joseph do the work. Jim later hired Joseph to work for him directly about 1910. Just the two of them worked together for over 30 years. They developed the single tub washing machine in 1912 and went on to the twin tub machine.

My grandfather made all the patterns for those washing machines and later for all of the vacuum cleaners made by Scott & Fetzer which is still in business today. The Kirby cleaner was sold throughout the world. They set up shop in Cleveland in 1910 and Kirby bought all the machinery including the vise I have. They later had two shops and thus the larger vise was purchased after WWI. Both of these vises are original pieces made by R Mfg Co, Nesboro P(A) USA. I have seen a price of about $1200. for an original 6 inch. Knockoffs today go for $300. on Amazon/Ebay.

Nothing would please me more than for you to have that 6 inch vise in CLE. If you have not purchased a vise yet and would like that vise, I will remove it from the bench (because I prefer not to sell it with the house) and ship it to you via UPS. There is a large UPS trucking depot very near and I would take it there, have them pack it and ship it to you. I will pay all shipping costs. This is my gift to you. Alls you gotta do is be home. This can happen in Sept when I go back for my 2 week CLE suffering. I told your mother that the best view of Cleveland is in a rear view mirror. She told Cleveland is just like Detroit except without the frills! Let me know if you would like that vise and I'll put your name on it!

With that said, I left off with looking for a way to repair the bevel adjustment cam handle that had broken off in transit from Ohio.

I ran this past my pal, Dan who's a skilled welder, and woodworker in his own shop 5 minutes north of my garage. This fellow has some kit in his shop. Austrian Table Saws with sliding beds and such. Dan means Business.

He recommended we try welding. We had to be careful to raise the temperature of the cast iron to 350F beforehand, then we fussed about getting the pieces to stay put while he applied some 308 Stainless welding rod. It took some time to get back to handleable temps, but much rejoicing was had since the welds held, and there were no fissures along the toe of the weld. Dan tapped this thing with a ballpeen hammer a bit to help relieve stress while it cooled. He also assumed the character of some fellow barking incoherent statements to nobody in particular when he had the welding kit going. I think this is the prerogative of the welding savants, right? I'd be saying all sort of gibberish if i were melting metal right in front of me...

Welds look goood from here. Thank you Dan!!!
Richard made this installation much much easier with his drawings taken from the previous installation of the vice. (he was an engineer at Boeing Aerospace back in the day). Thanks for taking the time to do this up, RIchard, it made the install a lot simpler!
With the drawings, I was able to lay out the recesses for the vice. I chose to mortise the attachment flange both on the top (about 1/16 shy of flush with the top) and about 7/16 on the side. the hard part was beavering out the material on a 5,1/2" thick bench top for the screwshaft, and the hub that this vice spins on. However, I have a plungecut circular saw that helped much. From there it was just a bit of hammering with my 16MM japanese chisel.
pulling the old twinscrew vice. i never used even half the clamp capacity on this thing...
With the top flange routed out, I had to turn the bench over to work on the underside. This approach to tipping a 400 pound bench with control involves clamping a 2x4 to the top and bottom, and you have a nice lever. Worked well for me!
I removed the captive nut holders for the twin skrew vice from the underside. I'm sure this thing could be useful some day, just not sure when,what,why.
Here's what the underside looks like after first trial fit. I had to increase the width of the skrew-shaft housing as I did not consider sqrt(2)*l which needs to be accommodated when it spins on the hub! Doh!

I also forgot to show any pics of the bench lying supine while I cut out the channels for the screw housing. Nothing special to see there.

Much fussing about with the fitment ensues. The underside perch for the connecting rod clamp took a bit of evolving to get to the right spot. I ended up routing out a bit more of the bench's underbelly, and adding a few washers to the receiving end to get the thing mostly in line. Seems to be OK from here.
This is the Emmert Pattern Maker Vice Salute Position. Yeah, gimme your odd shaped stick of wood, I'll grab it for ya!!!

Sunday, September 27, 2015

curved trundle bed surround v, installed

OK, here the piece rests, scribed into the surrounding wall, and screwed into base from the bottome via pocket holes I drilled a long time ago. I've dreamed of this day for a while as this is a perfect crash-pad for napping after a long ride or run. With prep for Oakland's Marathon up in March, It's nice to have this thing done when I begin the longer runs starting in December.

The walls are a deep red color and it makes for a pretty dark room. This might seem too dark and dreary, however the rest of the house is so brightly lit, that it's nice to have a room that is a foil to that. It's quiet, and also stays cooler during the summer months.

Here's how the trundle is deployed, using pulleys rigged on the interior of the base. I still need to make a handle for the cord. The trundle rides on six 1" non-swivel casters.

Saturday, September 26, 2015

curved trundle bed surround iv

The assembly is completed as best as i can get it in the garage. Next step is to lug 'er into the house, scribe to the walls, and skrew it in.

I tried a different finishing schedule for me. Sand to 180, then a few coats of Minwax oil polyurethane that was thinned 3 parts poly, 1 part mineral spirits so that I could use a rag to wipe it on thinly. before final coat of poly, I skuff sanded with 400grit. After final coat, I used 0000 steel wool,and then a coat of paste wax. I wanted a finish that was somewhat durable, but still left the wood feeling like wood. It's a bit shinier than I like, you still very much feel the wood when you touch it. expecially the panels where you have the harder winter rings a bit proud of the summer growth.

Here, I'm building up a few more pieces of redwood to strengthen the crotch, and infill the area where there will be more relief carving
I scribed in some masking tape off of the panels so that I knew where to cut with a handsaw to bust off the larger chunks of the crotch
The Auriou rasp is a joy to use
The frame now finish sanded
Wanted to show off the gappy teeth here, especially the wider edge, where a panicked hammer blow softened the edge a bit. This however is in better shape now if you can imagine than before applying a steam iron to the bruised wood to plump it back into place. Poor joints.
Here's my application tool, a waded up rag made from cotton duck of a worn out pair of carhart jeans. I love this cloth for applying finish as you can kind of burnish the wood it seems.
So once everything is finished, I just skrewed the panels into the frame like so. Notice I also beavered out a fair bit of wood along the interior edges to make scribing into the walls a little less horrible.

Thursday, September 17, 2015

Studying Colonial Doors in Aguascalientes, MX

Sarah and I spent a week supporting a cycling friend set the elite women's hour record at the fine velodrome located in the heart of Aguascalientes, Mexico. Land of Tu Gente Buena. Without knowing their reputation, we observed this fact since every shop owner, pedestrian, hotel worker, etc that we encountered was always so nice to us! A local who was helping with logistics clued us into the moniker. It was so encouraging. Travel there, see this town, the art, people, architecture, food.

Being an early colonial city, Aguascalientes is home of many gorgeous old buildings with massive doors originating from the earliest days of the building's life. I have no idea their accurate history but to say these doors were so handsome in person. So compelling to me. We were in town for a week, and while there were many locations to review, i returned to several doors, just to behold them, wonder, and relate in some minor way to the craftspersons involved in their germination hundreds of years ago. Also to whoever was servicing them today as we will see below

We first ventured into the student art gallery housed at the center of visual arts off Plaza de la Patrina. A very kind gentleman escorted us through our broken spanish and while lost in transmission, our hearts were in the right place. He pointed to the date placard on the outside wall of this building and I neglected to snap a photo, but it was in the 1600's. he could tell i was geeking out on the door and was happy to stay put for a shot here

After more closely looking at some of the doors, i noticed thes wrought iron nail heads (/clavos/ en espanol, learned from our curator friend above) with two shafts, driven through the face panel, and a supporting batten behind, then clinched back into the batten once they'd pierced the entire thickness. A very sturdy way of joining a support to the panel, no doubt. Very handsome, and perhaps sends a message of impermeability

My wife Sarah in front of a gorgeous door at Parish Sanctuary AguasCalientes: parroquia el sagrario aguascalientes. Notice how there are inner doors at a human scale framed by the larger ones.

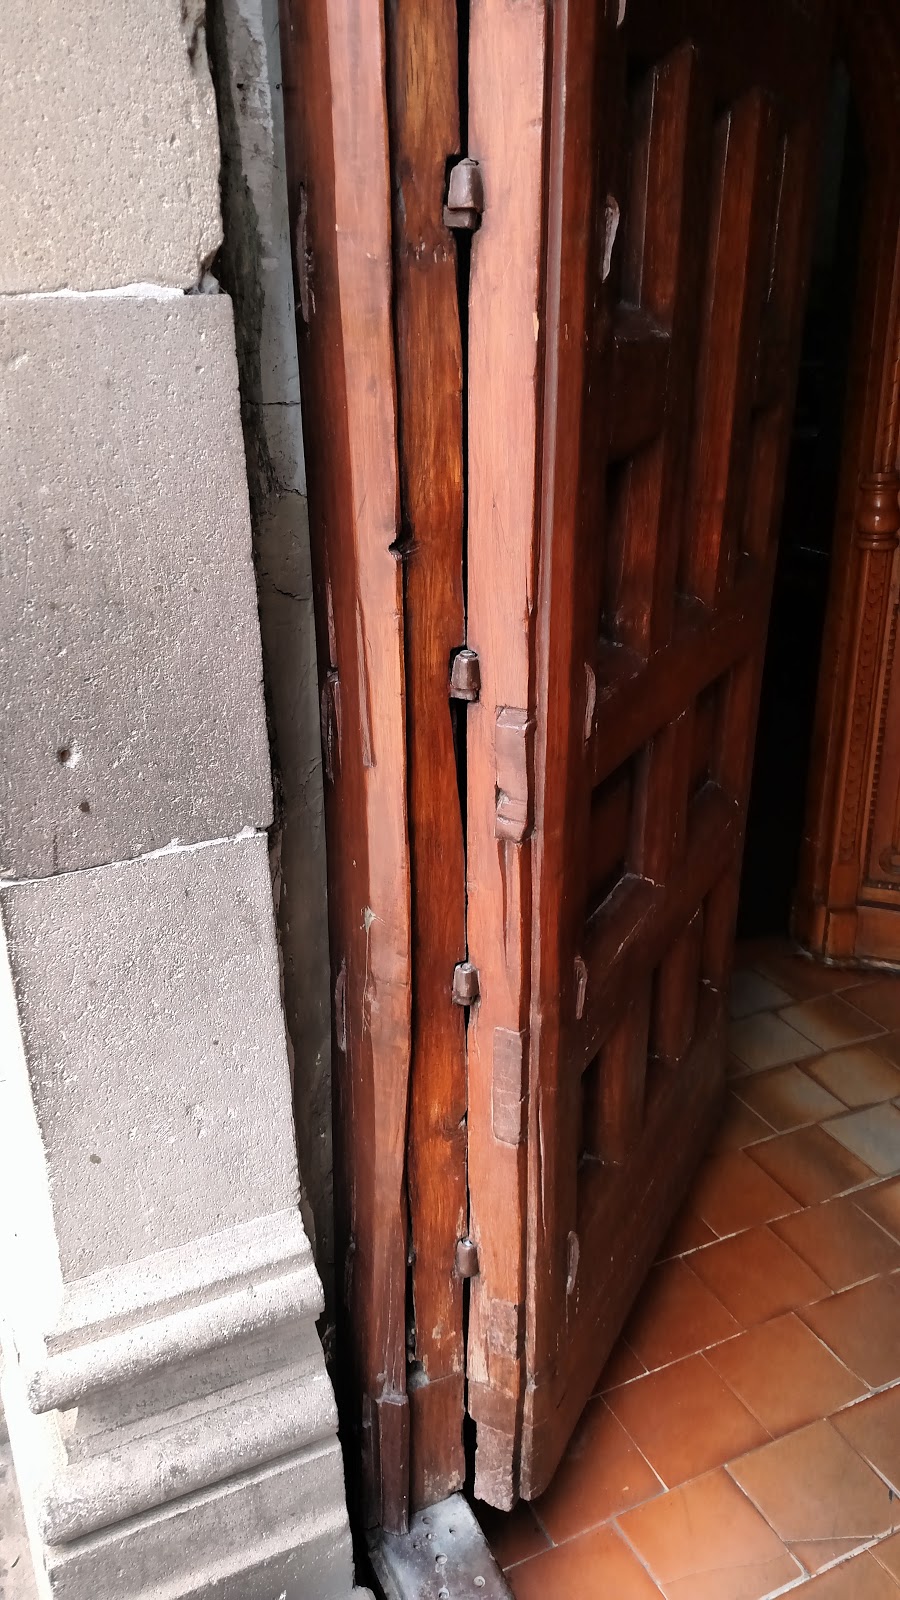
Down the street a fascinating door, appearing to have been recently restored. This has applied iron brackets for reinforcing, and are quite handsome. Notice the various shims between the mouldings, perhaps to help tighten up the structure? Then there's wedge shaped pieces sunken into the panels and stiles of the structure. Were these to repair cracks that had accumulated? I was so interested in this. I wanted to to talk with whoever was tending to this door, watch them work...

also notice there's a ramp cut into the stairs on the left here. I saw this a lot in the city where adaptations had been made in stairs for folks with physical challenges. It reminds me that the built world has to adapt to needs of the times in order to stay vital. I like that.

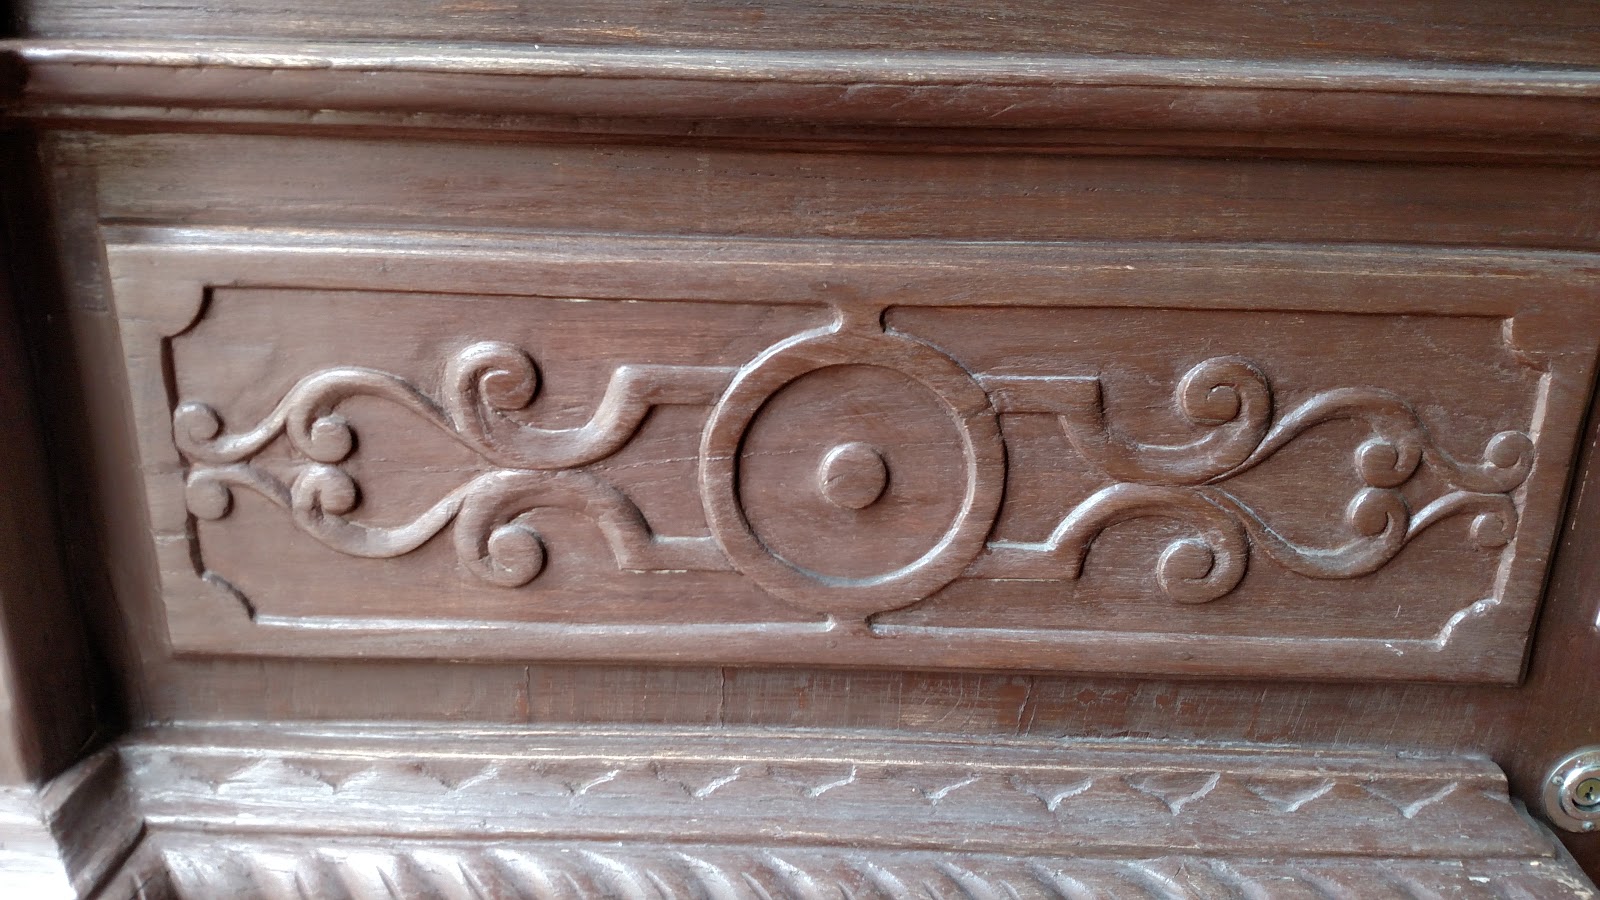
Now another one, painted, but I was really interested in the carved moulding. I could be way off, but I wonder if the sinusoidal carvings and patterns reminded me geometric patterns similar to Moorish architectural features you see in Spain.

Who gave the order to cut a mail slot into this side? Easy to ask that now...but this is much like the wheelchair ramp, right? we continually adapt our furniture, architecture to the present needs...I'd still have a hard time cutting that slot though...

Check out these old gimmal hinges and here you can also see the massive mortise/tenon joinery between rails and stiles