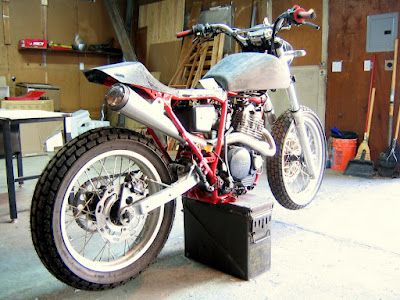
sand, add more filler, sand, add more filler
Saturday, January 31, 2009
Sunday, January 25, 2009
tank plug fairing
The idea is to apply a surface sealant that you can sand really smooth (I believe they call this process fairing). I use a mixture of epoxy resin and glass microspheres for the job. Tinted with a little black to make it a bit darker and easier for me to see.
Top side has a coat drying and once it's set, smear a bit on the bottom
Before all that, I layed down a bit of glass reinforcement to the underside and along the features of the tank's shoulder because it's kind of delicate with just the foam. Don't want this thing fracturing when building the mold pieces
Saturday, January 24, 2009
Nisky Garage
Just came across a link over at ADV Rider:
Nisky Garage is a mechanical eng. program offered at Niskayuna High School in Schenectady, NY. A few very inspired teachers and students restore and build up some pretty amazing bikes. Great ideas.
Bookmark their blog here:http://niskygarage.logical.net/nisky_garage/Blog/Blog.html
(Foto taken from their website, hope that's okay :) )
Sunday, January 18, 2009
tank plug shaping
Trying this one on for size. Have to cut some pretty deep reliefs into the shoulder of the tank to accommodate the forks and triple clamps. It's going to be a pretty complicated layup for me to do: the reliefs create an additional 'weir' line for the top part of the female mold, so it will need to be reduced to at least 3 sections. But I'm going for a bit of a stretched out appearance.
throttle up, chin forward, rear wheel loose, grab a gear, goooooo!
I originally found this pic on the advrider web forum, here:
http://www.advrider.com/forums/showthread.php?t=400341
EDIT: Looks like those guys at sideburn have taken up the cause, tho. That's okay. I'm engaged to an honest to goodness betty myself :)
http://www.advrider.com/forums/showthread.php?t=400341
EDIT: Looks like those guys at sideburn have taken up the cause, tho. That's okay. I'm engaged to an honest to goodness betty myself :)
Saturday, January 17, 2009
more foam fun!
OK! Back to business of shaping the tank plug. It's a real challenge trying to keep an amorphous glob of foam relatively square, so I used an old piece of glass from a sliding armoire and rubber glued some rough sand paper to it to help square up the major "facets" I then roughed out two pieces of cardboard from some drawings and pinned them to the side to help establish the profile. I ran out of foam mix towards the edges there but hopefully it won't matter since I'm rounding the edges once I'm ready for shaping the contours. |
Sunday, January 11, 2009
gas tank plug shaping
Left the seat pan on the back burner while beginning the tank, and that starts with a plug that a female mold will be constructed from. I'll use 2 part foam mix from Tap Plastics that I'll pour into a hastily made box with a channel build into it to help define the underside of the tank where it wraps around the frame backbone.
The foam cures within minutes while expanding quite a bit so I mix it in smaller turds to take up the space in the box (that's been prepped with tape and PVA for easier releasing)
And here it is, just waiting to get shaped. My friend Pepe thinks it looks great as is. I'm inclined to agree...sometimes it's better to leave things as they are: approaching perfection as opposed to taking them too far. It's actually a point of tireless anguish among all great sculptors.
Subscribe to:
Posts
(
Atom
)