Saturday, January 30, 2010
strong arm
More time spent shaping the mahogany arms for the handle. Yep, another test in precision. First getting orthogonal holes drilled into the arms for the axle without a drill press! Dowling jig to the (approximate) rescue. And again with drilling pilot holes for tenon of handle. Now! How to make sure these bearings through the hull are collinear? Hmmm.. will have to think on this one...


Wednesday, January 27, 2010
sussing out a handle
A simple but sturdy handle for Ratka's sewing caddy. I tested 1/2" thick mahogany with a 3/8" oak dowel for sheer strength by holding onto the mahogany piece suspended while the protruding dowel hooked the edge of a stud in the garage wall. Should be sturdy enough for the pivoting arms. Then through-tennons holding the horizontal member to the pivoting arms, probably made of this fine old doug-fir i resawed here a while ago. Cardboard mockup of pivot arms below to test proportions...


I got these nice cast-off pieces of African Mahogany from the local hardwood place. Very handsome and a true joy to work with. These will be the "arms" connecting the handle to the carcass


I got these nice cast-off pieces of African Mahogany from the local hardwood place. Very handsome and a true joy to work with. These will be the "arms" connecting the handle to the carcass
Sunday, January 24, 2010
Now the Fun Part
Planing the contours into the top of Ratka's sewing caddy was a joy.

Just roughing out the lines here for final glueup. Will continue shaping until I'm happy and there is no more tear-out in the wood.

Just roughing out the lines here for final glueup. Will continue shaping until I'm happy and there is no more tear-out in the wood.
Thursday, January 21, 2010
lateralized capstone
As expected, this was the most challenging facet to arrange in the top. The side piece wedges will then be the last hard part in this roof.

Monday, January 18, 2010
Handy Bits
My favorite part has been repurposing the mahogany from Ratka's old sewing machine bench legs into small details of the new piece. It's a very well behaved wood and has a scent that I've taken a liking to.
E.g. the "daggers" securing the undercarriage to the sarcophagus needed some sort of tab for easier handling. To wit, I resawed some of this nice old wood and made a pair of little doo-dads for easy grabby:


E.g. the "daggers" securing the undercarriage to the sarcophagus needed some sort of tab for easier handling. To wit, I resawed some of this nice old wood and made a pair of little doo-dads for easy grabby:

more on sewing caddy hat
There is the plan, and then there is the object, and the former is a vague rudder pushing me towards the latter, but in the end I always end up somewhere in the mud. That's okay. Not all facets terminate to points in the same origin!


I Kind of knew this would be a reality of the caddy's top for this piece: coopering the top side and then expecting every wedge adjoining to the lateral sides to end up directly towards some ideal geometric point we call "origin" was something to scoff at. As long as the seams hold, it's good enough for me tho!
Now, onto sections 3 and 4 (in the works, but being glued up...
Wednesday, January 13, 2010
BRAAAAAAAP!!!
Scraped this short track link from Sideburn's web log. Guy named Dale Lineaweaver took some indoor short track videos of an event happening in Las Vegas this weekend. Epic DICE!
BRAAAAAAAAAAAAP!!!
BRAAAAAAAAAAAAP!!!
Tuesday, January 12, 2010
sewing caddy hat
now to focus on the top of the sarcophagus for ratka's sewing machine.
I had originally planned a coopered top, with an even radius, attaching the lengthwise facets to the end via dovetailed "wedges". I'll still try to achieve this, but due to the sewing machine's thread spools being offset towards one side, I decided to make it a bit eccentric:

Planing all this rough old wood and then making gapless jointed edges using a powered jointer might have saved a bit of time. Hand tools give me that tiny fragment of wiggle-room for adjustments, though.
Witholding comments on this piece's rather severe proportions until I can round off the edges with a plane; hopefully that will make it a bit more inviting to the touch.

I had originally planned a coopered top, with an even radius, attaching the lengthwise facets to the end via dovetailed "wedges". I'll still try to achieve this, but due to the sewing machine's thread spools being offset towards one side, I decided to make it a bit eccentric:

Planing all this rough old wood and then making gapless jointed edges using a powered jointer might have saved a bit of time. Hand tools give me that tiny fragment of wiggle-room for adjustments, though.
Witholding comments on this piece's rather severe proportions until I can round off the edges with a plane; hopefully that will make it a bit more inviting to the touch.
Tuesday, January 5, 2010
sewing caddy undercarriage attachment
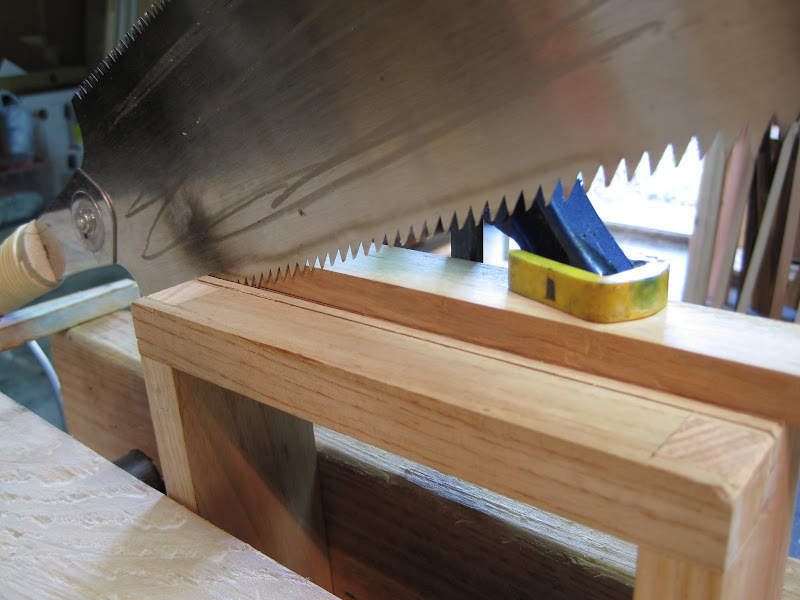
My next step was to cut some grooves into the lateral sides of the undercarriage to receive the interior edge of a long "tennon" used to hold the piece together inside of the outer carcass:

I used a chisel to beaver out most of the material between the saw kerfs, but resorted to fabbing up a 1/4" sanding stick to smooth out the bottom surface

Here, you see a few cleats I glued up to the interior of the carcass. These will be reinforced with oak doweling

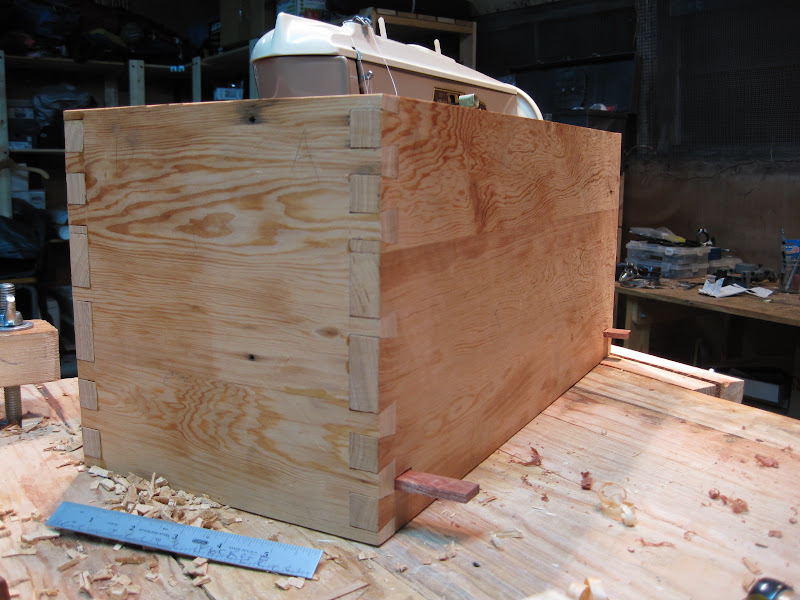
Here are all the parts: undercarriage, carcass, and two "tennons" that I hacked out of a piece of bubinga from a local hardwood store's cast-off bin

Everything together:

Here's a vid of how it works
I used a chisel to beaver out most of the material between the saw kerfs, but resorted to fabbing up a 1/4" sanding stick to smooth out the bottom surface
Here, you see a few cleats I glued up to the interior of the carcass. These will be reinforced with oak doweling

Here are all the parts: undercarriage, carcass, and two "tennons" that I hacked out of a piece of bubinga from a local hardwood store's cast-off bin

Everything together:
Here's a vid of how it works
Subscribe to:
Posts
(
Atom
)

