I'd been weighing the choice to get a table saw for years. Up to now, I got by without one through my hand saws, or a circular saw. But there are certain things I want to do where a tablesaw has an advantage, like accurate, reproducible crosscuts. or building cabinets from sheet goods. With a bathroom and kitchen remodel on my horizon, I'm hoping my table saw can get me through a lot of grunt work.
I also know it's a machine with a reputation of biting you badly if you mistreat it. I intend to operate the saw with my best discipline
I chose this Grizzly for many reasons.
- Lots of positive reviews on forums. Here's a compelling youtube video by professional turner Stephen Ogle
- a very accurate fence,
- a router insert on the right side table.
- I've had good success with the Grizzly band saw and drill press
- Good customer service
- Made in Taiwan
- ~$1500 delivered to my door
- it has more than enough power for me now (with some room to grow into with working more challenging woods).
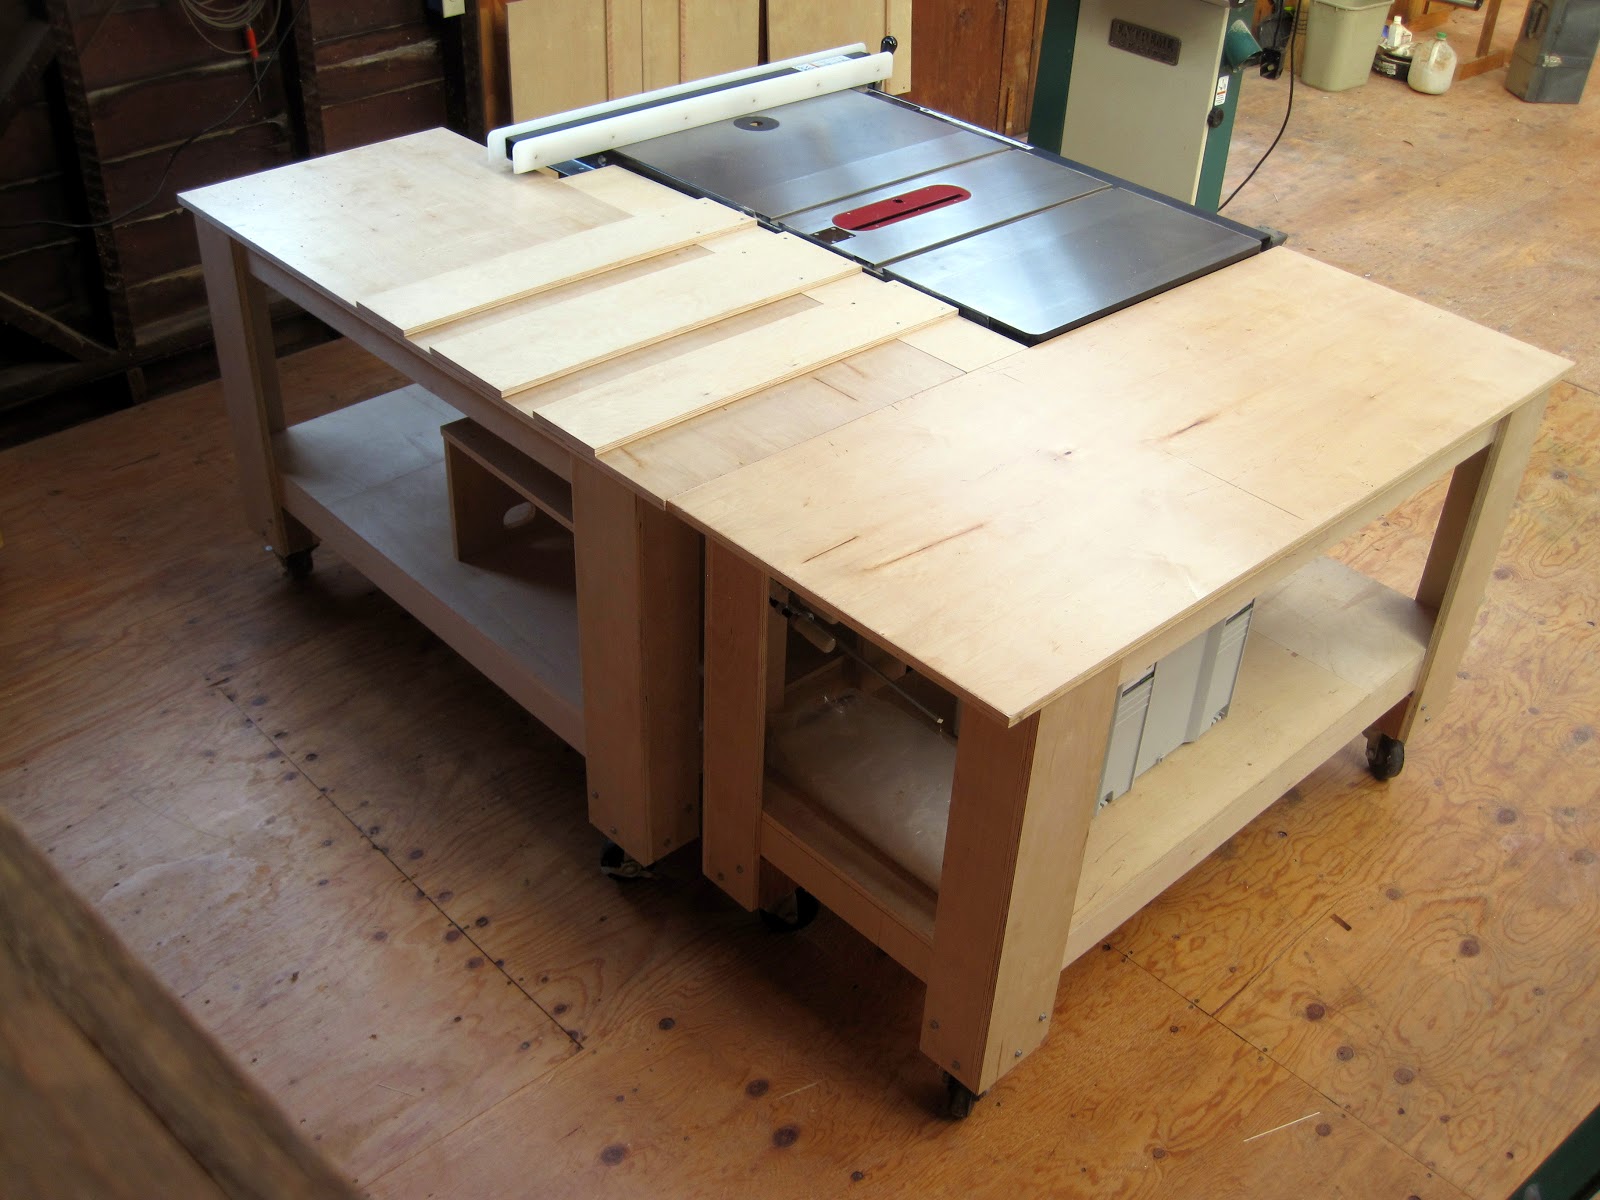
It arrived mid December 2014 via lift gate to by driveway. Here it is in it's current formation.

The crate was well intact when I received it, I fabbed up a sturdy dolly to ease it back into my shop. luckily i had some old OSB that improvised as tracks through the perilous ginger rock sea in our garden. this was arduous.
The thing came well packed, everything had its place. no missing parts, lots of documentation. also lots of that rust protectant on the cast iron pieces. I believe the call it cosmolene. Look at those gorgeous hand wheels. They are sweet to the touch.

Some hours pass since the preceding photo and the one below. That's the shaft that a gear attaches to, for tilting the trunnion. It's bent because I managed to tip the saw over while getting it onto the mobile base. landed right on the tilt wheel. That was a bad moment. so bad, i couldn't even cuss. Try not to do that.
Grizzly tech support was very helpful, and they had a spare tilt shaft in their warehouse for something like $8 and change. I followed his instructions to verify that there was no damage to the trunnions. Since it was a slow tip-over onto a plywood floor, it seemed like the damage was localized to the shaft itself.
the upshot is that I had a week to spend removing caked on cosmoline, and waxing the gorgeous, flat machined table tops.

Since I had to take the table off and get into the guts of the machine to replace the tilt shaft, I knew I'd be on the hook to completely dial in the table alignment with the trunion. You're supposed to calibrate the machine anyway, but apparently these things tend to come from the factory in remarkably fair tune. It was good practice.
here, I'm doing my best to establish blade to miter slot parallelism. Using a 1/64th rule to measure the distance. I used the combo square to make sure the rule was perpendicular to the miter slot as possible.

Here are a few views of the arrangement. Previously I had built some 34" high roller tables that I use for all sorts of purposes in my shop, primarily for breaking down sheet goods with my track saw. very handy with lockable casters. They're about a 1/2" short of the tablesaw height, so I quickly fabbed up some outfeed planks from scrap ply. this just sits ontop of one of the tables, and the spacing allows for miter sleds to run through without interference. It works okay for now.
An accurate crosscut sled was next on the agenda. I read plans from lots of folks, tried setting the fence using the
William Ng method where you take 5 successive cuts from a rectangular piece and on the last cut measure the difference in width front to back of the resulting piece. I only have a caliper measuring to 1/64th, so i'm not going to fuss too much about it. Probably the more appropriate test for me would be to cut a board in 2, flip one side and see if the edges line up OK.
Here's a panel sled, hopefully good for squaring off larger panels when doing casework.
I added a larger wood fence to the miter guage that came with the saw. The thing did not come predrilled with any way to attach the fence, so I had to drill out the holes. Luckily the metal was soft enough that my cordless drill made quick work of it.
Here's a view of the splitter/guard assy. I tried using it for a couple through cuts. Boy it really is hard to see what you're cutting with this thing in place.
For my first project, I wanted to build a roller chest of drawers like you see for automotive tools. I wanted something similar for my garage and this seemed like a low-key way to get used to the new saw. The objective was to build something as square as possible, fitting directly from the saw. This will become important as I tackle other cabinetry projects for the garage, bathroom and eventually the kitchen.
So here it is, 32" high, 20" wide, made of crappy birch ply. Waterbased poly for finish. cutting techniques used:
- Rabbet for back pannel
- dado/rabbet drawer box joints (from Bob Lang's Kitchen Cabinetry book -- solid read!)
- Dados
close up of the drawer joint. Used a 1/4" dado stack.


Too bad you didn't go for the SawStop saw...the price difference (about $2,000) is negligible when you amortize the machine over 15 years (to 30 years, depending on your current age -- if you had under 10 years left to do woodworking, you shouldn't get a new tablesaw anyway). If we can afford to do woodworking as a hobby or as a job, we can afford to get a safer saw. PERIOD.
ReplyDeleteA SawStop believer and user because I have seen it save fingers for both amateurs and production woodworkers
Well played, sir/madam!
DeleteAnon, For the last 50 years I have been using a saw sans sawstop and I am still intact. Too bad all us old timers were too dumb to know better. I say toughen up buttercup. You could take up knitting I suppose.
ReplyDeleteAngostura Bitter Boy, that is a fine saw, and your doing OK for a punk kid. Keep you paws out of the blade and you'll be damn happy. Try not to drink and fabricate, infact design drunk, fab sober.
Allen Watts had a book in the 70's called "Be Here Now" best safety advice ever ...in other words pay attention to the work at hand ... real nice saw and out table.. Thanks
ReplyDelete