Thursday, September 17, 2015

Studying Colonial Doors in Aguascalientes, MX

Sarah and I spent a week supporting a cycling friend set the elite women's hour record at the fine velodrome located in the heart of Aguascalientes, Mexico. Land of Tu Gente Buena. Without knowing their reputation, we observed this fact since every shop owner, pedestrian, hotel worker, etc that we encountered was always so nice to us! A local who was helping with logistics clued us into the moniker. It was so encouraging. Travel there, see this town, the art, people, architecture, food.

Being an early colonial city, Aguascalientes is home of many gorgeous old buildings with massive doors originating from the earliest days of the building's life. I have no idea their accurate history but to say these doors were so handsome in person. So compelling to me. We were in town for a week, and while there were many locations to review, i returned to several doors, just to behold them, wonder, and relate in some minor way to the craftspersons involved in their germination hundreds of years ago. Also to whoever was servicing them today as we will see below

We first ventured into the student art gallery housed at the center of visual arts off Plaza de la Patrina. A very kind gentleman escorted us through our broken spanish and while lost in transmission, our hearts were in the right place. He pointed to the date placard on the outside wall of this building and I neglected to snap a photo, but it was in the 1600's. he could tell i was geeking out on the door and was happy to stay put for a shot here

After more closely looking at some of the doors, i noticed thes wrought iron nail heads (/clavos/ en espanol, learned from our curator friend above) with two shafts, driven through the face panel, and a supporting batten behind, then clinched back into the batten once they'd pierced the entire thickness. A very sturdy way of joining a support to the panel, no doubt. Very handsome, and perhaps sends a message of impermeability

My wife Sarah in front of a gorgeous door at Parish Sanctuary AguasCalientes: parroquia el sagrario aguascalientes. Notice how there are inner doors at a human scale framed by the larger ones.

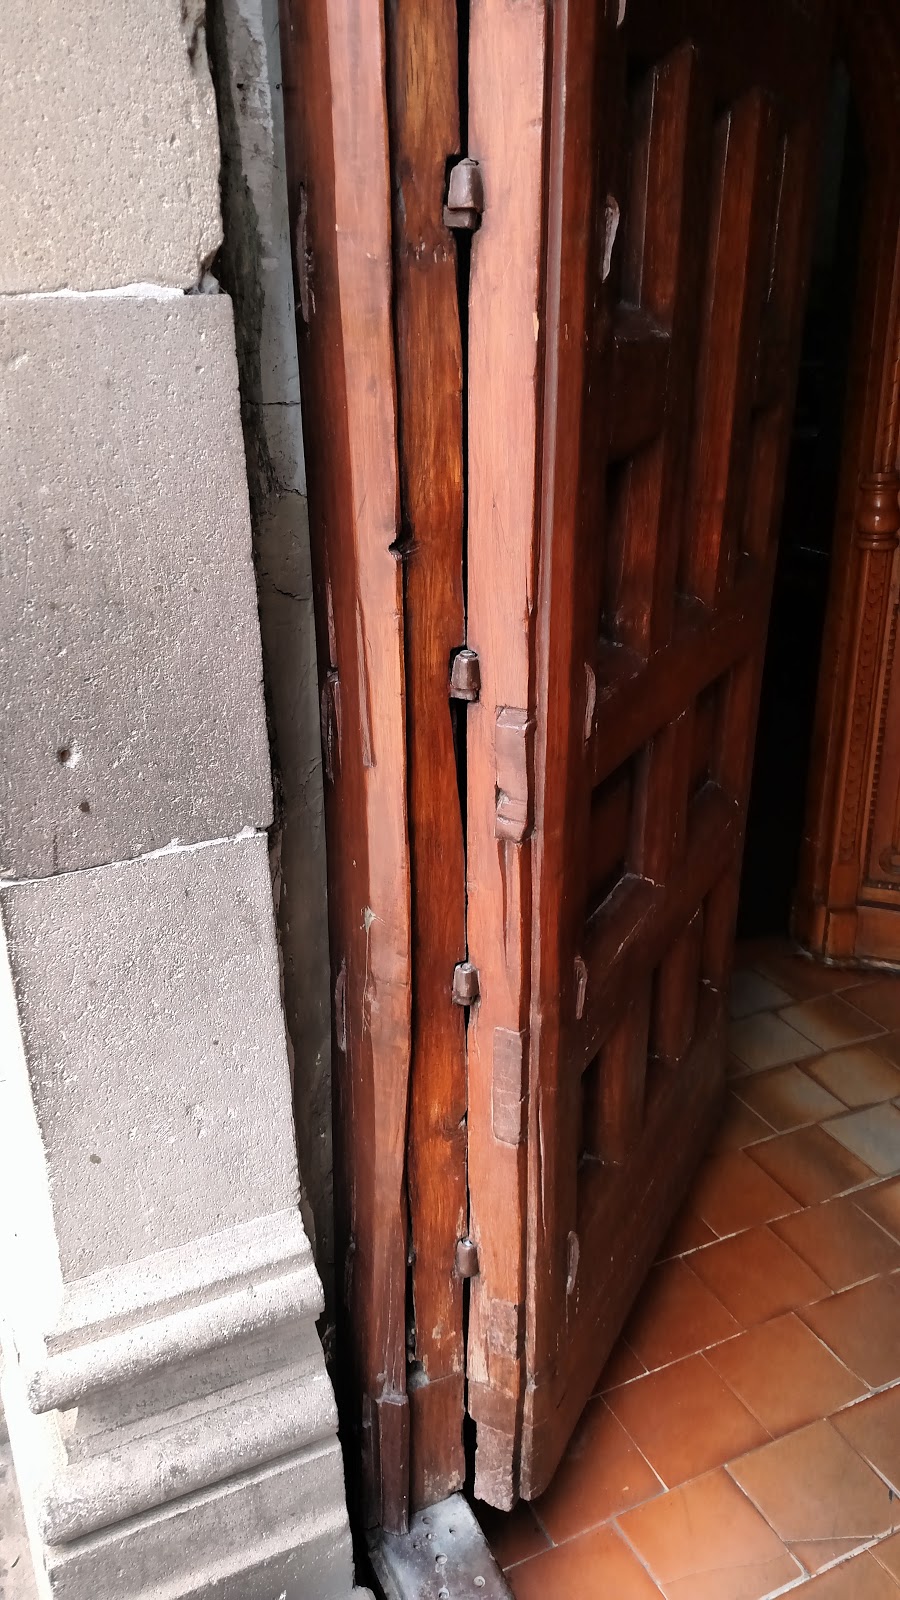
Down the street a fascinating door, appearing to have been recently restored. This has applied iron brackets for reinforcing, and are quite handsome. Notice the various shims between the mouldings, perhaps to help tighten up the structure? Then there's wedge shaped pieces sunken into the panels and stiles of the structure. Were these to repair cracks that had accumulated? I was so interested in this. I wanted to to talk with whoever was tending to this door, watch them work...

also notice there's a ramp cut into the stairs on the left here. I saw this a lot in the city where adaptations had been made in stairs for folks with physical challenges. It reminds me that the built world has to adapt to needs of the times in order to stay vital. I like that.

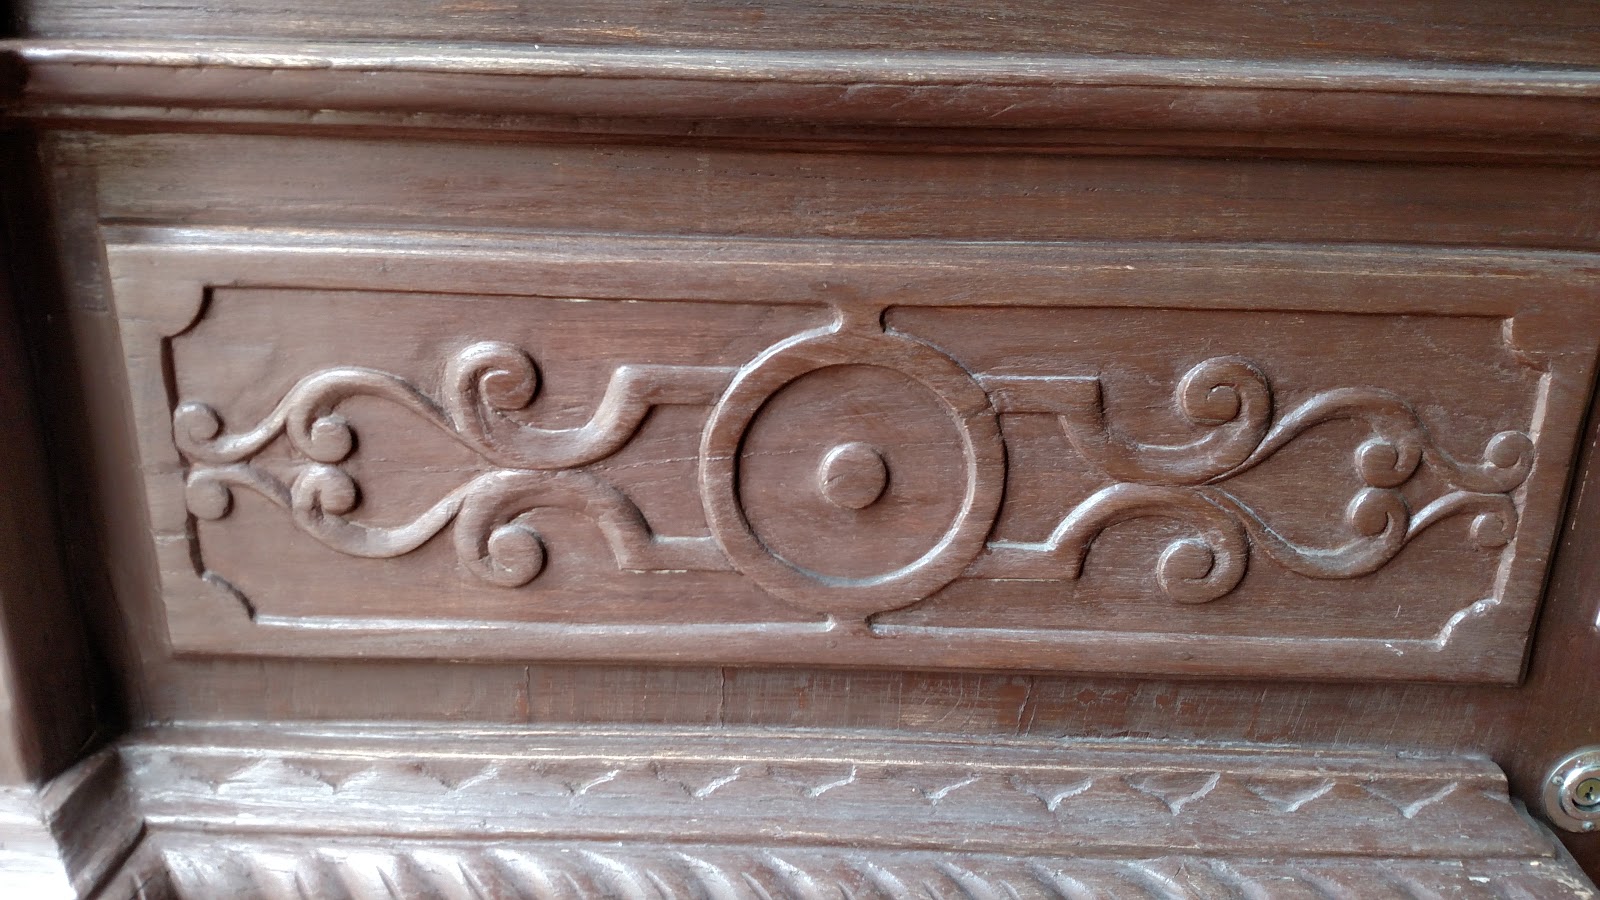
Now another one, painted, but I was really interested in the carved moulding. I could be way off, but I wonder if the sinusoidal carvings and patterns reminded me geometric patterns similar to Moorish architectural features you see in Spain.

Who gave the order to cut a mail slot into this side? Easy to ask that now...but this is much like the wheelchair ramp, right? we continually adapt our furniture, architecture to the present needs...I'd still have a hard time cutting that slot though...

Check out these old gimmal hinges and here you can also see the massive mortise/tenon joinery between rails and stiles

Monday, September 14, 2015

Emmert Pattern Maker's Vice Repair Question

Hey there colleagues - Divine Providence sent a genuine Emmert's patternmaker's vice to me, and I cannot wait to start a restoration thread on this ingenious piece of early 20c engineering. Sadly, the vice arrived with a critical lever broken off. I'm wondering if anyone out there has some ideas on how I might go about repairing this cast iron? Something deep in my core says JB Weld won't cut it.

Saturday, August 29, 2015

curved trundlebed headboard surround iii

My next step was to veneer the curved panels. From my experience using cauls to hold down the second layer of 1/4 wig wood ply, it seemed that a different clamping scheme would be required. the cauls I made just never appeared to deliver sufficient pressure at mid span, and no manner of wedging/tightening seemed to deliver this without causing a gap to form elsewhere.

I posed the question to woodcentral.com and the old salts there advised vacuum bagging. This made sense and so I grabbed a vacuum pump and bag assy from joe wood worker's website. I could have spent the time getting my own pump and bag setup done, but this guy's got the entire solution. www.joewoodworker.com

I'll begin with showing where I left off with the panels today, sanded to 180grit.

Here's a dry assembly of the piece
All this wood started from a reclaimed cache of redwood that I found at Earthsource Lumber, harvested from an abandoned water tower in Northern California. Lots of scrub planing and wood picking ensues.
I don't have the pics on hand, but essentially I took the planks at ~8" wide, and planed them on my machine. I then resawed into 1/8" sheets, and then sent these through the planer again to clean up the sawn edge. the final milled thickness was around 3/32", So I had to send these sheets through on a strip of 3/4 plywood. I used masking tape sandwich with hot glue to hold the sheet to the bed. Ben Crowe from Crimson Guitars on a youtube vid demonstrated this technique
Ellis Valentine at WoodCentral.com gave me the tip to use finishing nails like so to gather enough edge pressure to join the bookmatched veneers. The show side is face down here, and I used masking tape to pull the sheets together initially, as is typically done. I then folded along the seam,ran a bead of glue and then returned the edges together. The nails just provide an extra oomph to the clamping.
My ribs were too far spaced to handle the vacuum pressure, so I added extra ribs, at roughly 4,1/2" spacing and this helped prevent the panel from dipping under the vacuum pressure.
ON the short panel, after a few days of being in the hot garage, I noticed a few cracks in the veneer. I don't know why, perhaps I took it out of the bag too soon. The ambient temps were 70-80 degF in the garage and I had it in the bag for almost 6 hours. I filled the cracks with a slury of redwood sawdust and white glue. The long panel has yet to exhibit this problem, although tonight I heard a few audible split sounds in the panel, so i'm not sure where this will end up.
I used UniBond 800 Urea Formaldehyde glue which dries hard, but I don't want to inhale any of that dust while planing/scraping it off the edges.
My scraper plane worked magic on the rough sawn side of the bookmatched veneers, before using the palm sander.