I continue with the headboard panel structure, leaving off here today

I began the weekend by adding a second layer of 1/4" wiggle-wood ply. This time I use glue alone to attach the wood to the substrate below (which was in turn attached to the plywood ribs/longerons via screws and glue). I elected to do this instead of skrews because i wanted to test how I'd apply veneer to the substrate using clamps and cauls, as opposed to some other means, like vacuum bagging. I just don't want to deal with that kind of regalia in my shop right now.
nearly every available short range clamp was recruited for the long panel


Here's a closeup of the cauls used, assembled from 1/4 birch ply scraps, and the offcuts to the rib cross sections

I didn't glue the vertical stiles for the frame/panel assembly so that I could scribe the curved part of the stile in the same plane as where it would finally be attached. Here I get a rough outline traced from my pattern, and then once within an inch of final dimension, I measure the offset into a long strip of thin plywood for a hole that a sharpie marker can fit into. I run this along the inside edge to get the actual location of where I want to make the cut with my dreadful sabre saw. blue tape helps with the line definition.


After some careful trimming, the panel sits close enough to the inside edge of the stile. It's not perfect, but I'm thinking since the panel will be nested inside the frame by 1/16" or so, small gaps like this won't matter so much.

Dry fit with the vertical stile now in place, seems OK

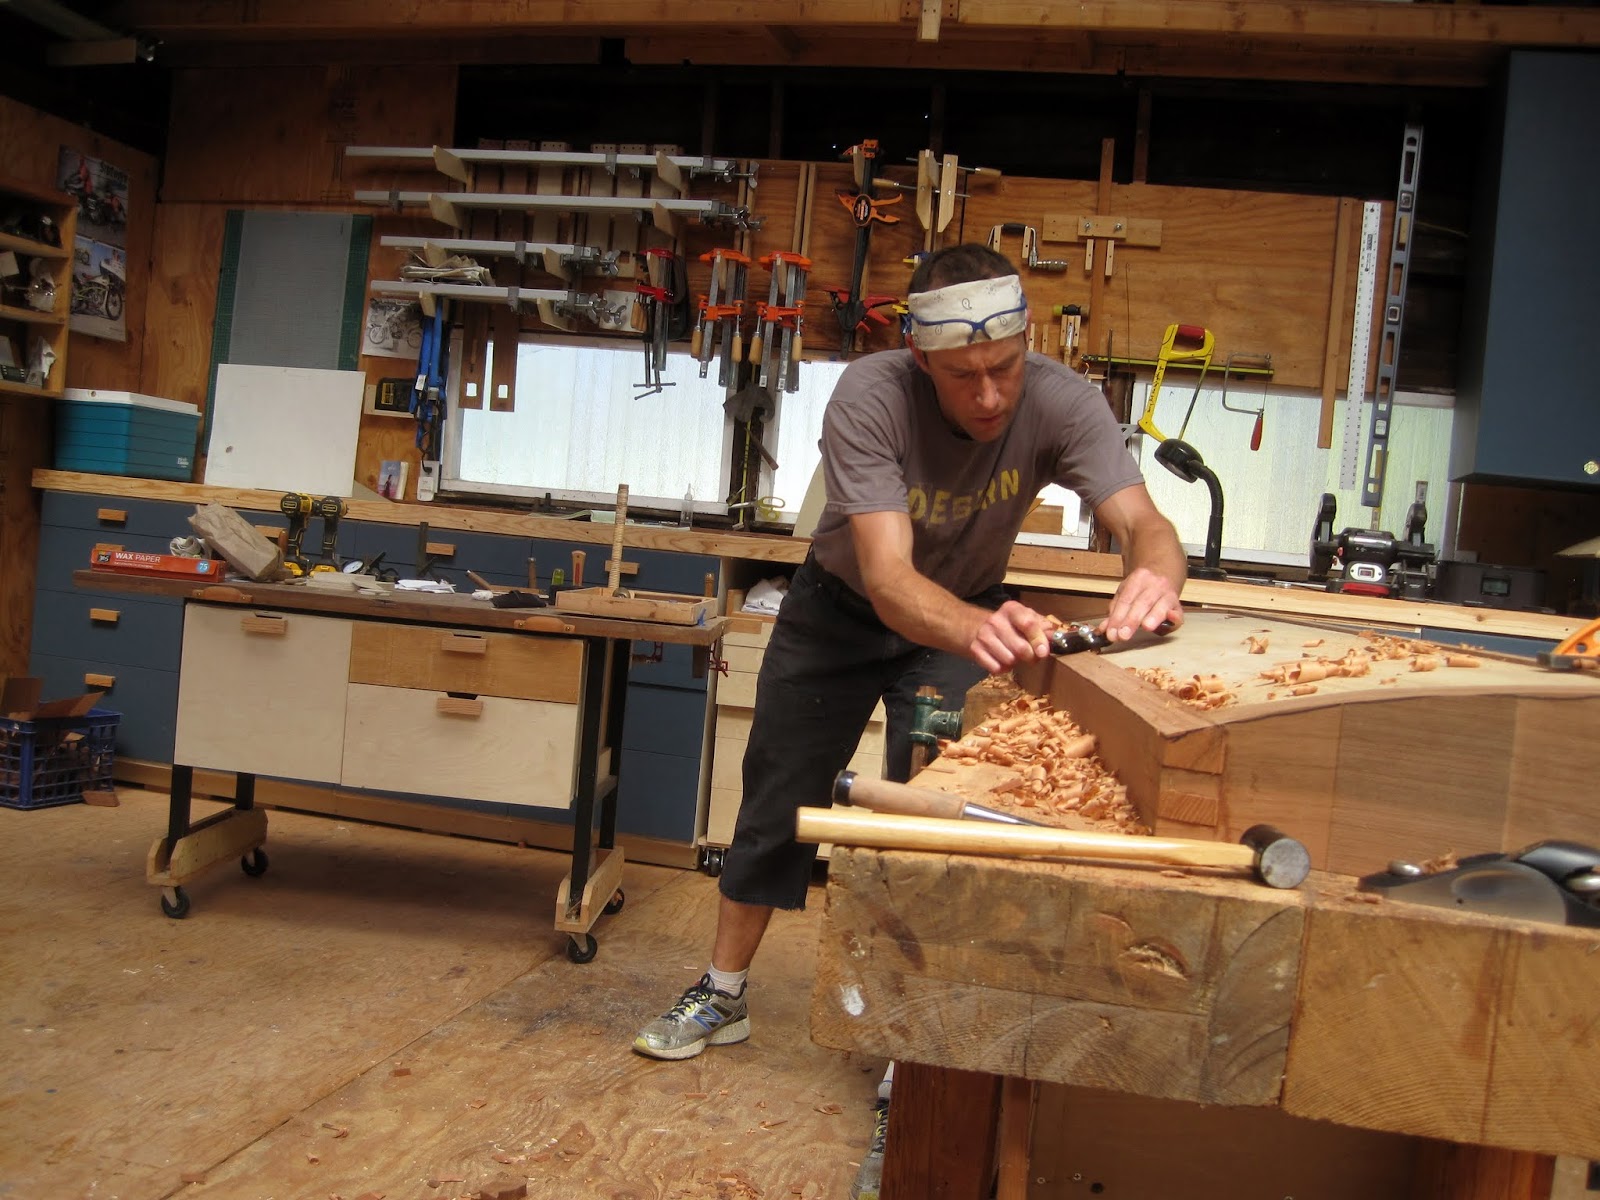
after practice, the other side was closer

Now the fun part, shaping! I"d been looking forward to this for a while! nothing like whipping out the spokeshave for some hot tapering action, baby.


No comments :
Post a Comment