Showing posts with label workbench. Show all posts

Sunday, July 8, 2018

updating shop handtool storage

after spending time in curtis buchanan's workshop for a full week and understanding how pleasant work can be when the tools are logically arranged and easy to reach, i set forth to rethink how i store mine.

Here is the plan, a chest of drawers that fits between the metal frame of an upcycled desk that i've had in the shop since the beginning.

Here you see the metal frame'ed desk with an improvised table top on the right. An old, quickly thrown together 3 drawer arrangement on the left used to occupy the space between the desk legs. It has always felt kind of janky.

what makes this desk successful in my shop is the sturdy caster enabled hooves on the base, abling one to tow the table with one hand to wherever it is needed in the shop. work flows much better when the tool you need is within arm's reach as opposed to hanging on the wall around the bench and out of reach.

the construction is mostly CasaDespair pine, and i spend a while picking through the stacks to find some nice enough material that I milled down to 5/8" and then jointed into panels that will divide the chest into 3 equidistant tiers.
I left the stretchers at 3/4" and cut dadoes on the interior walls, while applying dovetails to the outside joints. it feels pretty sturdy even though it's pretty light.
I am trying a drawer construction technique that is new to me. it's simply rabbets that are glued up and then pinned with wooden pegs. For the upper drawers, i milled a 3/4" wide and 1/4" deep groove on the sides with a dado stack. these will ride on rails that i will skrew into the interior sides of the chest. The drawer sides are made of offcuts of ash that my contractor friend let me have from a project. it's very tough wood but it mills nicely.

The bottom drawers will run on metal slides that i had 3 extras from an earlier project. this makes sense because the drawers will hold my heavier bench planes, etc.

I layed out the drawer heights based on my existing tools, and how they group naturally in my workflow. there's also room for more tools, but not much, and i really dont have much need for more tools right now.
I had originally thought to put glue storage in this chest as well, but i opted out since the jugs are too large a format to make space for in this place. best to store this somewhere else.

Sunday, January 30, 2011

bench surface holding

Finally conjured the strength to drill an array of 3/4" holes through the top of my bench. These holes can then be used by various kinds of appliances to help keep pieces in place. It's very 16th century.


With a spoke shave and a block plane made a few bench dogs that friction fit into the holes. You just tap them with a mallet from underneath to expose them.


One row of 8" spaced holes along the front for the surface vice, and then a row of wider spaced holes along the back for the hold-down


A close up of the hold down by lee valley. The neck fitting into the surface has some toothed ribs to find purchase in the holes.


Hold-down


It really does a nice job and will obviate a lot of rube goldberg clamping machinations that I've gone through to hold material down while dovetailing. Probably also would have spared me a recent trip to the ER for 5 stitches in my thumb a couple weeks ago.


Surface vice

The one disappointment of the day was the surface vice Lee Valley sent me...in concept it's really cool, but I think i got a defective part. The aft support has threads only on 1/2 of the chanel, such that you can turn it counterclockwise to disengage the threads and quickly reposition the vice fore/aft. Once where you want it, you turn the support clockwise to re-engage the threads, and then tighten it up to hold your work. Well, mine doesn't quite engage the threads enough so it jumps out of adjustment without hardly applying any load to the threads...drat

Monday, September 6, 2010

Ecco!


Joining the top

I saved all Saturday just for the mortises. Four inches deep, 2" wide or thereabouts. Ouch.


So I wimped out and got my trusty hand drill out with the biggest bit in my arsenal, a 1/2 incher! It went pretty quick and I could use my brace to chew out the interior and then pare away the rest with my chisels


First time I tested fitment of the legs into the mortises, they got wedged in REALLY TIGHT, and no amount of huffing could get them out. I knew I had a scissor jack in the trunk of our car, but in a fit of laziness located a two boards near by, and FORSOOTH, a FIRST CLASS LEVER was born!


it actually worked pretty well, I could lift the trestle up, shove a couple boards under the tennon shoulders on one end, and then creep the other side up in a similar manner. I only had to do this about 57 times before the fit was working.

The next step was to figure out how to drill in a reasonably accurate way. A couple years ago in a stupor of inaccuracy, I grabbed a doweling jig at the local hardware store. These things are absolute junk for doweling, but the one I had had a nice metal index for the drill bits that I remembered. So I harvested it from the jig assembly and clamped it to the walls of my benchtop like so. Worked pretty well, and I was able to then use the same approach to place the holes for the tennons with a tad of offset in a reasonably predictable manner:


After attaching the legs, it was time to flip it over onto its feet.

Sarah implored me to wait for some house guests to arrive to help with lifting this thing (we were going out to dinner this evening). But I couldn't wait for them, and I could not lift the thing on my own. So I decided to use my dolly like so as a second class lever:


And I was able to get the bench on its side pretty easily like this:


Pause to drill some 3/4" holes for work holding pegs to support material during edge work.

trestle part 2

I had planned on using draw bored pegs to provide the tension necessary to hold the long stretchers in place when building the trestle. However my capability to precisely locate an offset hole in a tenon is not up to the job


So I decided to just tack a couple cleats to the inside of the stretchers for a board that could act as a clamping bridge to hold my glue job together. I'd then just drill and peg the joints as I had done previously


The trestle ended up pretty square so I wasn't too disappointed, but I'd have to come up with a different strategy if I wanted to use drawboring for the top.

Thursday, September 2, 2010

trestle part 1

Well, OK then! Now that the legs are cut to length, time to put the stretchers together.

I'm making the stretchers out of, GET THIS, reclaimed 2x10's I found at the architectural salvage site. some were reasonably straight but had some cup and wind in them that needed to be attended to. I first ripped them down to 6" wide with my skillsaw trick, and roughed them to flat with my scrub plane, then finished with a jack plane. The scrub plane got a lot of miles in today


I've mapped out the joints into the legs to look kind of like so: 1,1/4" thick tennons, 2" deep:


The stretchers will consist of a lamination of the above boards, looking like so:


I based the dimensions on how the legs lay up against the edges of the bottom of the top here. The critical one to measure out here is the tennon shoulder of the outside part of the stretcher lamination. It's close, but of course not perfect.

I'll have to fiddlefart a bit to get the two ends of the trestle close before mortising and drawboring. But my plan is to get the ends fitted and glued up first, and then I'll be able to have them set up for the more awkward fitment of the longer stretchers later. Make sense?


Back to the mortising! eeks, even with a 1,1/4 auger bit, bashing away 6”x1,1/4”x2” deep mortises is a workout. I don’t do them much so it’s good practice.


Doug fir seems to get harder with age, or rather the the late summer, slow growing part of the rings seems to get harder. Here, the ossified rings feel almost crystalline against the chissel.


after a lot of shoulder pairing (I should have been a bit more careful with the shoulder cutting in the first plae), the joints close up fairly well. The gap-filing capabilities of Titebond III will be explored here.

I did NOT drawbore these pegs since I have a wide enough clamp to hold the end pieces together.


The second pair of legs went together much like the first, but now I had something to build them off which helped with making the alignment decisions.


OK it’s now time to stitch the two lateral sections together with some beefy stretchers.

Once the end assemblies were finished, I went for the long stretchers, but before laminating them up, I clamped the boards up to the base to mark off the tennon shoulders like so:


Then, after marking and cutting the shoulders, and then laminating the stretchers, i tested fitment of the assembly like so, note the temporary cleats I screwed onto the tennons to hold the clamps in tension. worked okay but was awkward with only one pair of hands. I think Rube Goldberg would approve:

Monday, August 23, 2010

sorting out the legs

Here's how the legs will be spaced, overall height will be about 33" tall so that I can get over the bench planes when working the wood. The legs here will have 4" long tenons draw-bored directly into the top like so:


I'll offset the shoulders such that there's 1,1/2" clearance on the outside, and 1/2" on the inside like this:

Wednesday, August 18, 2010

face vice install

time to get this twinscrew vice in place. Most designs i've seen have tabs cantilevered off of the bottom of the benchtop which accept the large threaded nuts for the screws. Your vice chop then is wide enough to attach at these lower points but still be flush with the top surface of the bench. In my case, with a 5,1/2" thick top, I was facing quite a wide chop. I didn't like the potential wracking that would happen to the vice if I was clamping small material...

...plus I wanted to use this last piece of wood from the original beam, which would only be the thickness of the bench itself. So I decided to plunge the vice screws deep into the underside of the bench such that they protruded from the middle.

layout looks as follows:


I then went crazy with a 1,1/4" auger bit to bore out as much material as possible


Making these deep trenches to relive the vice screw had me a little concerned about compromising the bench's strength. Originally I planned to cut the sides of a deep groove all the way across the width of the underside with my skill saw, which would have been much easier to beaver out the waste than boring with a 6" brace. But I figured it would be stronger if I could leave some of the full thickness of the bench intact, and only relieve that part that had to accommodate the screw. it actually didn't take that long to rough out:


I then made two wooden holders for the nuts that sink into the recess like so:


After fiddling a bit to get the nuts properly oriented in their recesses, here's how it looks all bolted up from underneath


I then flipped everything over and roughed out some handles


and here's the first test drive, it holds really well, don't have to apply much torque to the screws to hold this 2x4.


I kind of like working at this height, really low to the floor makes sawing with my japanese saws very easy. Might have to spend some more time rethinking my height of 34"

Tuesday, August 10, 2010

flattening the bottom of the top

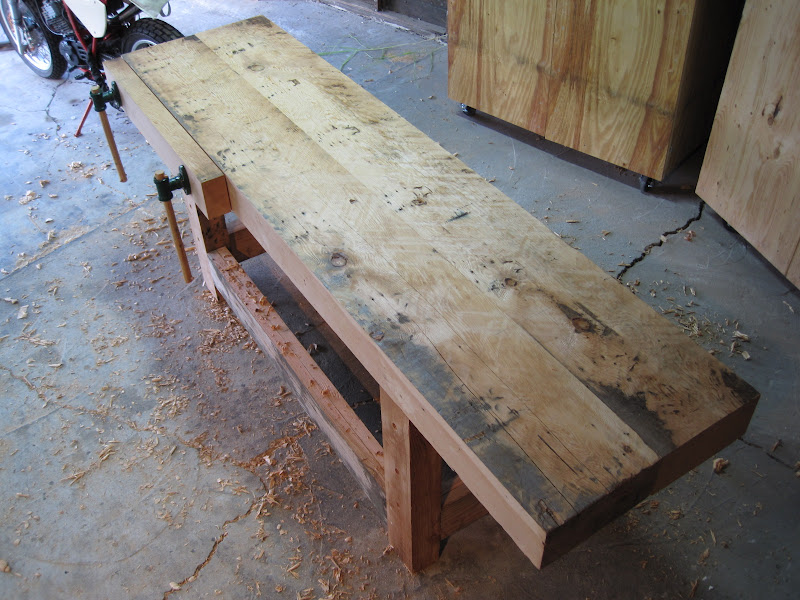
Yup, spent an evening after work beavering away at the bottom surface of the top now that the glue's reasonably dry. You want this sort of flat so that the attachment of the legs/stretchers is reasonably predictable. It also provides a bounty of shavings for the litterbox of our cat Spartapuss.

First with the plane designed to remove lots of material in one swoop with its heavily radiused blade (Lee Valley makes 'em). Diagonal strokes per Schwarz et. al.


...then proceed to my Jack plane, the longest one in my small harbor of bench planes