Sunday, April 20, 2008
dreaming
Saturday, April 12, 2008
Fitting the airbox
Spent a little more time wet sanding after the holes were cut to get a reasonable finish
Intake rubbers fit on just fine, look like they'll take a little silicone sealant or the like just fine.
Tuesday, April 8, 2008
Banke Status
Perhaps the biggest frame revision involves repositioning the top rear triangle rails to be horizontal. This is kind of important to build into the frame because street trackers have a minimal saddle tank configuration that requires any adjoining space be taken up by the frame. Because the bolt securing the top of the monoshock needs room to be backed out for disassembly, we couldn't have both the rails extend directly towards their horizontal position on the frame backbone. James came up with a simple workaround to have one side rail curve downwards at its forward joint so there would be room for the bolt to back out. This asymmetrical configuration to me is REALLY COOL because it's so purposeful and simple. I think it coincides excellently with my plans to fabricate a custom seat pan showcasing this design. It will only add to the overall effect.
Here, in yellow we see where the left side rail will be finished, and the blue lines roughly illustrate where the right side rail will accomodate the shock bolt:

I'm also blown away with how the rear brake has taken shape. The pedal from the existing bike was repurposed to modulate the linkage that drives the Brembo plunger here. This is the sort of creative reuse of old objects for the present that inspires me to be a part of architectural restoration!
Here we see how the rear caliper attaches to it's mounting bracket. The word "Tumble" is written to indicate the type of finish, and we'll do a simple 1" hole in the center of the bracket for aesthetics. Bracket is an aluminum plate that uses the axle as it's main mounting point, and then there's a slot on the other side of the swing arm where it is "Keyed" onto a nubbin much like the drum brake originally was to keep the assembly from spinning when the brake is applied.
Another shot of the rear brake assy.
The other side of the rear hub where there is plenty of angle grinder action evidenced :)
Here's an establishing shot of the 3/4 view. Yes, that's a BSA in the background.
Forks have also been successfully shortened with extra beef and less cheese.
Wednesday, March 12, 2008
seatpan prototype
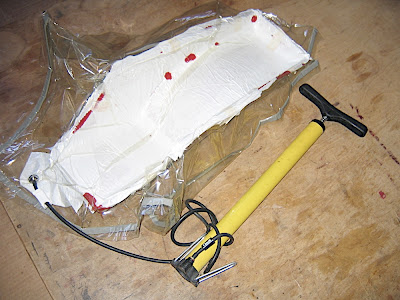
Readying everything for the part layup. It's a lot of messing around with six layers of glass cut into facets, then peel ply, then breather cloth. Oh, and a vacuum bag that'll hold the goopy mess once it's ready for curing!
Here we see the layup in progress. I'm experimenting with pigmenting the resin so that I don't have to bother with painting (the fumes would overpower the shroomy mellow of my petite domecile). This isn't quite orange enough for the Honda flash red that I like:

I wrote a neurotic little passage on Instructables.com on how I do the bagging stuff. So far this assembly is holding it's pressure, so that's good. Just hope the resin cures:
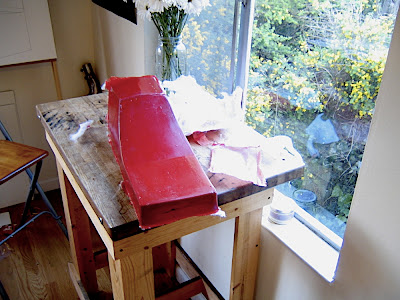
And here's the raw piece, ejected from the mold. Has a few boogers where the PVA dripped on the mold, but no big deal for a prototype.
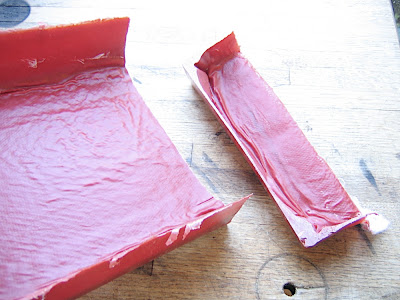
My main concern for this exercise was voids in the layup. This particular run had a lot of epoxy+milled glass fiber smeared in the corners to help fill in these areas that are typically hard to cover well with cloth and resin alone. I added too much, tho, and you can see how the peel-ply left a bit of a crease in the corner from smooshing the resin slurry to either side. Less next time?
Sunday, February 10, 2008
chassis on wheels
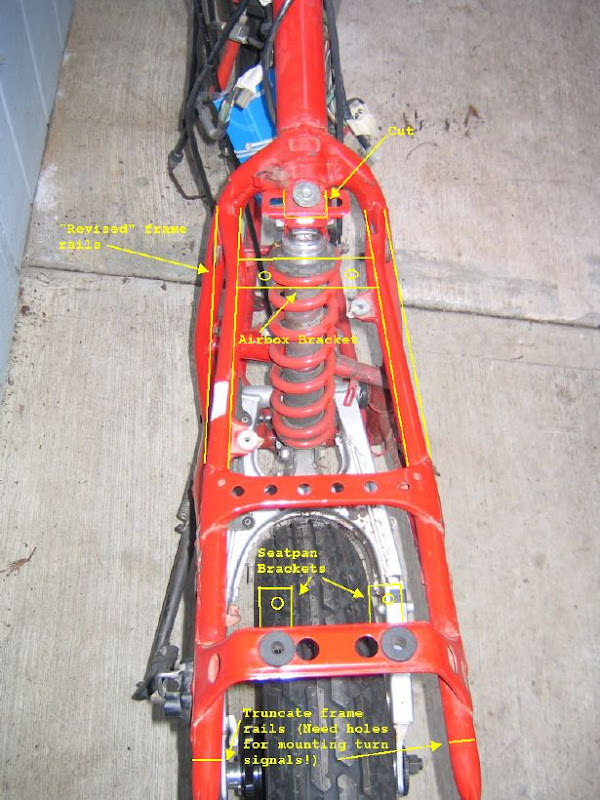
Here's the frame with the gorgeous wheels, image edited to show where frame rails will be truncated, some tabs removed:

I think we both were surprised at how well the bike would take to the new configuration. James scored a pair of '90 CR500 43mm cartridge forks for the build, and their tripple clamps went on no probs, apparently. He'll have them shortened a bit, but for now, we just slid them down in the triples to get an idea of how the bike would look. I can't get past the wheels, myself, but it looks really well!
A rough outline of how the seatpan assy will be oriented. Gotta go with the XR750 fender shape:
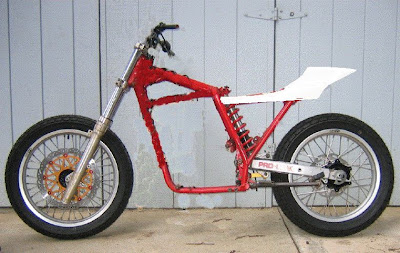
I did a rough sketch of frame revisions that will take place here:
Monday, December 31, 2007
Engine Reassembly Part II
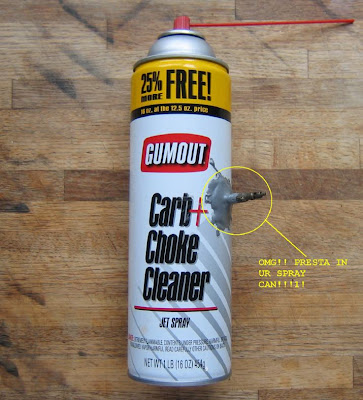
There was still a lot of residue from material blasting the head, so I needed to clean it well with spray carb cleaner, and compressed air. I have no air compressor, so I stole an idea from instructables.com to make a simple air blower from an empty spray can, the presta valve from a bicycle tube, and JB Weld. Redneck Air cans are GOOOOO!
Cam chain tensioner install is pretty mean with the need to preload the spring all the way "open" so that it does not interfere with the cam/sprocket/chain reassembly. I rednecked a tool to hold it open out of wire:
The string (floss) helps guard against it falling into the bowels of the motor
One last check before saying goodbye to the head
All closed up!
Saturday, October 13, 2007
Engine Reassembly Part I
Bead blasted gorgeousness thanks to Meyer's Sandblasting in Fruitvale anex of Oakland.
Time to install a new timing chain. Off with the clutch...Inner clutch assy. lock nut is really on there. Need cheeterbar on the socket handle, and to track down a spanner wrench for the grabber. ugh. soft aluminum.
Someone on a moto forum suggested welding the old steel clutch plates together and then a handle to them. Makes much sense, especially since the ones I got are kind of old and warped:
I opted for the Impact Wrench solution. Craftsman model 27299, rated at 250ft/lbs. Bap!Bap!Bap!Bap!Bap!Bap!Bap!Bap!Bap!Bap!Bap!Bap!Bap!Bap!Bap!Bap! and it was off like nothing!
Same deal for the lock nut that holds everything down for the main drive shaft. Notice that the splines are keyed so that they only go on a certain way. This ensures that the pulse generator (that detached black box thing to the right of the drive shaft) gets impulse from the pulse rotor nubbin at the right time.
OK, new timing chain looped onto the shaft and ready to go. Funny, the one it replaced did not seem to have stretched in comparison! Nothing like waisting a lot of time and $ strictly for experience alone!
Everything ready for closing up now. One final look before gasket and gasket sealer goop. Opted for the soft cure kind, but in retrospect would have just not used it; nothing wrong with a little oil leaking out there compared to the mess of trying to take that clutch cover off next time around. real men don't use gaskets.
My accomplice chad torquing down the case nuts.
Stator reassembly was pretty uneventful (no gasket goop this time). So here's the whole bottom end, ready to go:
Here, we've got an action shot of gapping the piston rings. Very exciting.
A whole bunch of fussing and worrying later and the jug's onto the bottom end, with 10.5:1 high comp. piston!
Here's where it sits for now until the head is cleaned up enough for reassembly.


