Sunday, January 30, 2011

bench surface holding

Finally conjured the strength to drill an array of 3/4" holes through the top of my bench. These holes can then be used by various kinds of appliances to help keep pieces in place. It's very 16th century.


With a spoke shave and a block plane made a few bench dogs that friction fit into the holes. You just tap them with a mallet from underneath to expose them.


One row of 8" spaced holes along the front for the surface vice, and then a row of wider spaced holes along the back for the hold-down


A close up of the hold down by lee valley. The neck fitting into the surface has some toothed ribs to find purchase in the holes.


Hold-down


It really does a nice job and will obviate a lot of rube goldberg clamping machinations that I've gone through to hold material down while dovetailing. Probably also would have spared me a recent trip to the ER for 5 stitches in my thumb a couple weeks ago.


Surface vice

The one disappointment of the day was the surface vice Lee Valley sent me...in concept it's really cool, but I think i got a defective part. The aft support has threads only on 1/2 of the chanel, such that you can turn it counterclockwise to disengage the threads and quickly reposition the vice fore/aft. Once where you want it, you turn the support clockwise to re-engage the threads, and then tighten it up to hold your work. Well, mine doesn't quite engage the threads enough so it jumps out of adjustment without hardly applying any load to the threads...drat

Saturday, January 22, 2011

old salvaged wood, fine grained but muddy, unappreciated

sometimes i like to just look at my stickered wood and dream...this stuff came from my favorite architectural salvage site, Urban Ore located in Emeryville 3 blocks from where I work. Most of my material comes from this place because you can find old old doug fir from demolitions. fine grained, smooth, beautiful wood encrusted in years of rusty nails and neglect. still good and quite amenable to repurposing for the stuff I like to do.

On the left, a few pieces of 4x material that I want to join together for a coffee table. On the right, shelving possibilities. our house is in dire need of some good wall hung shelving...soon


I'm edge joining a few pieces for a coffee table for our living room here. stay tuned to see how it turns out :-)

Monday, January 10, 2011

rehabilitation box

a late holiday pressie for my wife sarah ends in a hastily wrapped project with a cryptic note:


the project began with some african mahogany that i needed to rethickness from 3/4" to some planks roughly 5/16" for a small box project that she can put do-dads in:


joining resawn material like this is called a bookmatch:


I don't usually like the hinge hardware you find on small scale boxes, so I'm looking at different ways to make a hinge from wood. this one bonds the axle to the interior of the lid, then with two holes drilled in the sides, you get a mechanism that can work okay. I first made a small dado in the lid to better accept the axle and prevent it from squggling around during clamp up:


lid detail. I have to relieve the corner in order to rotate inside the box with this hinge design. I did this trimming with a chisel, and preferred to leave the cut marks in place instead of sanding this part smooth


Pre-assembly cross section, just to see how this little thing goes together. The bottom is facing upwards here, and so the idea is to place the lid into the side holes, and then glue it all together at the dovetail pin/tail junctions. Pretty simple


closed and finished. I'm no fan of stains that change wood's intrinsic colors and varnish or thick sticky resins are not my thing either. I use a paste wax. It doesn't really change the color much at all. I find it very sensuous to apply, and it smells like oranges...wonderful.

Here, you can just make out the 1/4" dowel pin where the hinge nests through the side of the box. everything is encased. sure, you loose a bit of storage capacity by my answer to that problem is: make some more boxes!!


yawning open. Sarah likes the tab for the lid. makes it easy to open. The box is still new and there is a bit of friction in the hinge and the lid sides rub against the inside of the box. I imagine it will loose this friction with use, which is too bad (i like the way it behaves right now)

Monday, September 6, 2010

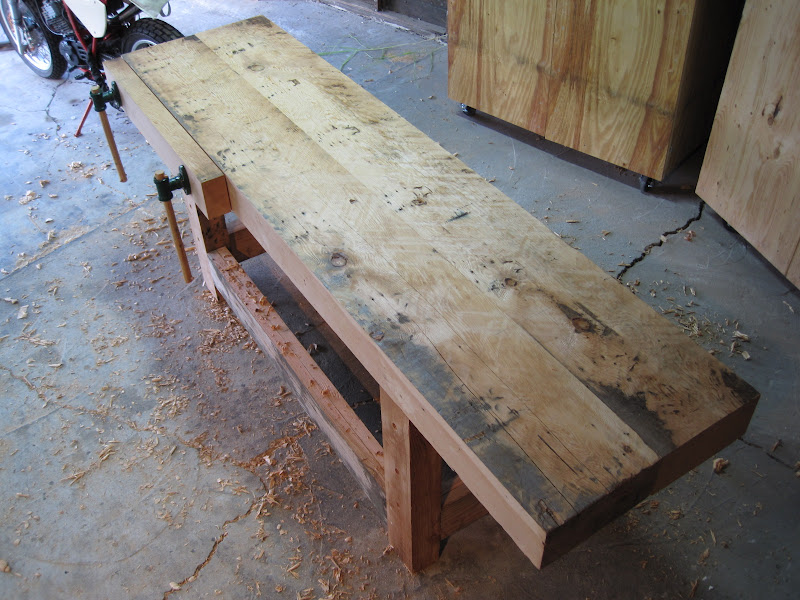
Ecco!


Joining the top

I saved all Saturday just for the mortises. Four inches deep, 2" wide or thereabouts. Ouch.


So I wimped out and got my trusty hand drill out with the biggest bit in my arsenal, a 1/2 incher! It went pretty quick and I could use my brace to chew out the interior and then pare away the rest with my chisels


First time I tested fitment of the legs into the mortises, they got wedged in REALLY TIGHT, and no amount of huffing could get them out. I knew I had a scissor jack in the trunk of our car, but in a fit of laziness located a two boards near by, and FORSOOTH, a FIRST CLASS LEVER was born!


it actually worked pretty well, I could lift the trestle up, shove a couple boards under the tennon shoulders on one end, and then creep the other side up in a similar manner. I only had to do this about 57 times before the fit was working.

The next step was to figure out how to drill in a reasonably accurate way. A couple years ago in a stupor of inaccuracy, I grabbed a doweling jig at the local hardware store. These things are absolute junk for doweling, but the one I had had a nice metal index for the drill bits that I remembered. So I harvested it from the jig assembly and clamped it to the walls of my benchtop like so. Worked pretty well, and I was able to then use the same approach to place the holes for the tennons with a tad of offset in a reasonably predictable manner:


After attaching the legs, it was time to flip it over onto its feet.

Sarah implored me to wait for some house guests to arrive to help with lifting this thing (we were going out to dinner this evening). But I couldn't wait for them, and I could not lift the thing on my own. So I decided to use my dolly like so as a second class lever:


And I was able to get the bench on its side pretty easily like this:


Pause to drill some 3/4" holes for work holding pegs to support material during edge work.

trestle part 2

I had planned on using draw bored pegs to provide the tension necessary to hold the long stretchers in place when building the trestle. However my capability to precisely locate an offset hole in a tenon is not up to the job


So I decided to just tack a couple cleats to the inside of the stretchers for a board that could act as a clamping bridge to hold my glue job together. I'd then just drill and peg the joints as I had done previously


The trestle ended up pretty square so I wasn't too disappointed, but I'd have to come up with a different strategy if I wanted to use drawboring for the top.

Thursday, September 2, 2010

trestle part 1

Well, OK then! Now that the legs are cut to length, time to put the stretchers together.

I'm making the stretchers out of, GET THIS, reclaimed 2x10's I found at the architectural salvage site. some were reasonably straight but had some cup and wind in them that needed to be attended to. I first ripped them down to 6" wide with my skillsaw trick, and roughed them to flat with my scrub plane, then finished with a jack plane. The scrub plane got a lot of miles in today


I've mapped out the joints into the legs to look kind of like so: 1,1/4" thick tennons, 2" deep:


The stretchers will consist of a lamination of the above boards, looking like so:


I based the dimensions on how the legs lay up against the edges of the bottom of the top here. The critical one to measure out here is the tennon shoulder of the outside part of the stretcher lamination. It's close, but of course not perfect.

I'll have to fiddlefart a bit to get the two ends of the trestle close before mortising and drawboring. But my plan is to get the ends fitted and glued up first, and then I'll be able to have them set up for the more awkward fitment of the longer stretchers later. Make sense?


Back to the mortising! eeks, even with a 1,1/4 auger bit, bashing away 6”x1,1/4”x2” deep mortises is a workout. I don’t do them much so it’s good practice.


Doug fir seems to get harder with age, or rather the the late summer, slow growing part of the rings seems to get harder. Here, the ossified rings feel almost crystalline against the chissel.


after a lot of shoulder pairing (I should have been a bit more careful with the shoulder cutting in the first plae), the joints close up fairly well. The gap-filing capabilities of Titebond III will be explored here.

I did NOT drawbore these pegs since I have a wide enough clamp to hold the end pieces together.


The second pair of legs went together much like the first, but now I had something to build them off which helped with making the alignment decisions.


OK it’s now time to stitch the two lateral sections together with some beefy stretchers.

Once the end assemblies were finished, I went for the long stretchers, but before laminating them up, I clamped the boards up to the base to mark off the tennon shoulders like so:


Then, after marking and cutting the shoulders, and then laminating the stretchers, i tested fitment of the assembly like so, note the temporary cleats I screwed onto the tennons to hold the clamps in tension. worked okay but was awkward with only one pair of hands. I think Rube Goldberg would approve: