Showing posts with label green woodworking. Show all posts

Sunday, September 6, 2020

handling an open-sweep hook knife blade from wood-tools.co.uk

Hoo Boy, a gorgeous hook knife blade arrived yesterday in the mail from robin wood et. al!
I take as little time as possible getting a handle glued up and didn't even think to show construction fotos, but imagine making a thin relief using a chisel and a router plane for the blade shank into 2 1/2" thick pieces of padouk wood (just because it's reasonably hard and there was anerrant piece of it in the shop.

Use some 5 minute 2part epoxy and a few clamps to produce this rough piece

this is how i like to make my knife handles. maybe a little shorter than the handle that Wood-Tools makes, but it's a little thicker in the middle, where you typically apply a lot of force as you "roll" the knife blade towards you during spoon cutting. it fits my meat hooks fairly well. wood handles rule.
I love this quote. Mary Kondo isn't saying anything new, folks!

Sunday, May 10, 2020

lil' lodi apple wood serving spoon

only had one afternoon this weekend to make this little serving spoon. punches above weight in capacity, but s stubby handle. would be useful in a family style meal where there's a bowl of rice everyone digs into. This one is still a little thick and will be cleaned up a bit once the wood dries
Dad sent me another parcel of Lodi Apple wood segments. we disucssed the best way to divide up the pruning for maximal yield
it arrived cut up perfectly as discussed
I decided to dive into the stubby section, seeing 3 short but wide spoons if i cut the thing into 1/3rds well enough. My Ryoba rip teeth cut through the green long grain like i was slicing rare steak.
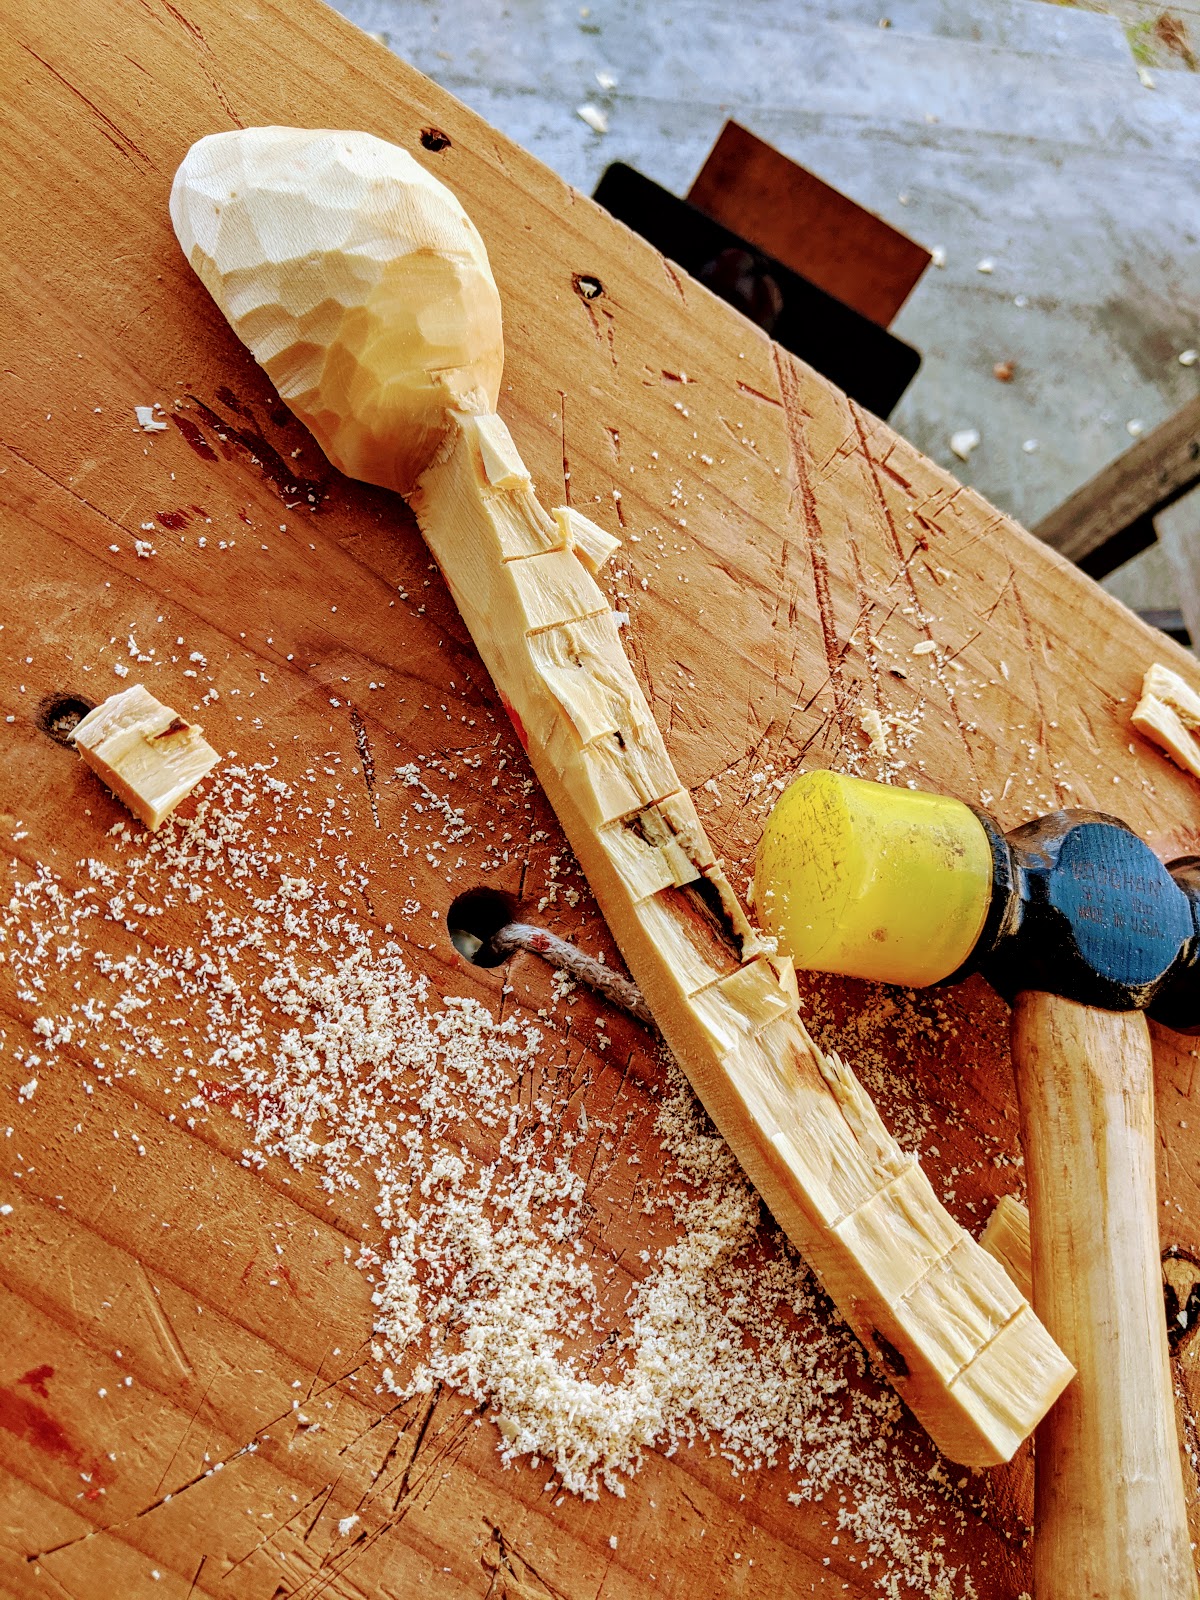
This was a hand-tool only endeavor and not just to be a Luddite. a quick series of stop cuts like this can then be easily broken off with a chisel to make a flat underside for a reference surface while holding the blank down on my lap table
I then roughed out the profile on the top of the spoon. this is the bark-side facing part of the split. The spoon is gonna be wide and scoopable. not much of a handle, but that's ok
and here it is after roughing out. Now to let it rest a few days before cleaning it up. seems to dry quickly

Sunday, April 19, 2020

carving from a lodi tree that i grew up with

countless helpings of apple sauce and pies made by mom originate from this one Lodi tree planted almost 50 years ago on mom and dad's farm. Dad sent me a few lengths from a recent pruning to try out. these were smaller ones, meant to test the wood for carving, and justify sending more.

my findings? yes, please keep 'em coming

the shorter section had the heart off center, so it allowed me to make a spoon with a fairly large bowl. this could be a serving spoon of some sort. the green wood is pleasant to carve. it cuts cleanly and also with much more ease than if it were dry
The aggresively crooked piece was a bit more challenging, with a knot off to one side the grain was a bit unstable. I kept at it with my 2-hander hook knife since it allows for a lot of power to be applied into the cut.
i don't think i'll be able to use this for general cooking practices, but it is a fun shape to have and i'll keep it around
close up of the bowl with a knot imparting lots of swirly grain.
the smaller piece yielded a delightful little spoon whose bowl punches above weight. i like how this one is turning out and will let it dry out a bit before finishing it.

Saturday, April 4, 2020

more spoons from curbside wood

A couple spoons today from the spare limbs that i found earlier this week from some curbside tree trimming. what struck me today and
the branches had natural crooks in them. this is the layout approach taken. not following any strict pattern aside from applying the natural bend in the tree to establish the crank in the spoon.

Some folks like to carve out the outside of the bowl BEFORE cutting the inside. i've tried both today and have to say that making the bowl first is a bit easier for my process. i think it has to do with having the wood as a billet underneath which makes it more easy to clamp to my knee bench with the rope-holddown. i then find it easier to pare away the outside of the bowl afterwards, using stop-cuts and just carefully paring away with a very sharp chisel.

here, i use the back of my gouge to check symmetry of the bowl

i'm establishing the overall shape of the spoon here. the grain kind of tells you what the shape of the handle should be. following the grain reminds me so much of shaping oak chair spindles in Jonesborough, Tennessee.

Sunday, March 29, 2020

carving spoons from a recently limbed street tree

while on my morning jog today, i found this limbed tree near my house with a few promising branches. i don't know what the species is, but the limbs looked pretty fresh. so after returning home from the run, i rolled out on my bicycle with my ryoba saw to cut a few useful sections for spoon carving. i wish i snapped a shot of the tree and it's leaves. it's actually a pretty nice carving wood in green.

My first spoon from the wood was not so well planned, as it had the pith running through the handle. good practice tho.

this other spoon i made today originates from a crook in one of the branches where there was a bifurcation off the leader branch. the fibers all run collinear with the crank in the spoon. it's something i have not had a lot of experience with, carving directly from the tree, but for me i receive good feedback from the grain in the wood to "tell" my knife where to go. this also means you can't just apply a "spoon template" to the wood and force it to obey the lines. you have to flow with it and let the spoon emerge from the wood. believe me: hours can pass in the blink of an eye while engaged in this work.
got a few cuts on my thumbs over the past few weeks, so today i'm applying some athletic tape to just add a little extra protection. it's helpful.
the new kuska knife made short work of this green wood. with both edges of the hook being sharp, it has numerous hand positioning and force direction possibilities. i'm still learning this tool, but so far, very happy to have it in my kit
The rest of the photos are just showing the roughing out of these pieces.

Tuesday, July 10, 2018

hook knife and carving axe arrived today from Wood Tools!

Oh, joy! my hook knife and carving axe arrived today from Wood Tools. I got a right handed decreasing radius hook knife and their carving axe. Both came carefully wrapped with edge protection shown (and for the axe a generous few turns of plastic wrap to hold the edge guard in place.

They arrived sharp, and ready to rock. I will have to wait before i can test these out due to life circumstances, but putting them to use keeps me looking forward to them

Here are some closeups. the handles are very comfortable, without a finish which is my preference with wood handles. The octagonal cross section of the spoon knife feels perfect in my hands.
Also coming with the shipment is a delightful little brochure revealing the characters behind this small business and a background sketch of the proud traditions embodied in Sheffield steel working.

Sunday, June 24, 2018

jonesborough afterword

well, here the finished sackback windsor from Curtis Buchanan's class sits with the final coat of varnish, scrubbed down using 0000 steel wool and then paste wax. this will be the ultimate writing chair in our guest room/library.
I was a bit worried about assembly after transit home, but i kept the spindles in a low oven for a few hours, and then used Titebond liquid hide glue. I love that glue now, it's not as grabby as yellow glue and has a bit more open time.
I also scabbed on a piece of the original oak to my little boo-boo on the outer perimeter of the handle. worked a treat.
here she stands with the base layer of barn-red milk paint. it's hard to see in the computer photos above how the red is expressed underneath a washcoat of black. but it's apparent. it i think is my favorite way of painting wood. it's hard to do and requires a lot of patience and also elbow grease.
i read this book on the airplane to/from Tennessee. It's a collection of 7 short stories, focusing on the hardscrabble family life of the Atlantic coast of Canada. i had to weep as discreetly as possible on the plane.
here is a very special spoon that i brought home from jonesborough. turns out it is fantastic at serving quinoa, just like the maker suggested. now onto building a shaving horse...and finding a proper riving froe...and maybe an axe...and putting that god damned table saw up for sale on craigslist...

Saturday, May 26, 2018

Curtis Buchanan Sackback Day 7

It's May in Jonesborough, TN, USA. Big downpours of rain can last for 5 minutes or 5 hours, depending. We woke today to the latter amount of rain and Rob was kind enuough to swing by my cottage and pick me up to get to curtis' shop without running through old town with a garbage sack raincoat improvisation.

Luckily we started the day with more spindle work to get these things in their final tune. I needed some mule work to warm up with. For the sack back chair, we have 3 intersections to nail with the spindles where they hit the seat, the armrail, and the crest rail. you get real close using test offcuts that have been drilled using the bits you used for the attaching pieces. There's a system for this that Curtis uses and it's really helpful. I don't want to do anything but make spindles for the rest of my life. I'll wear a monk's habit and take a vow.

here we're using a rat's tail file to define the taper of the bores of the hand rail that the spindles have been tuned for using an offcut
Next up was to get the crest rail joined to the hand rail. yep, more hot angular drilling action was in play using sightlines in two directions, and two comrades to spot your angle of approach.
because the crest rail is perfectly tapered from the tapering system that we applied on tuesday, we use reamers used for cello tuning knobs (i think) to orient the hoop in the right direction. you are considering a multitude of factors when doing this involving forwared/reverse/twist. These reamers are amazing in their effect. just a few shavings will give a measurable impact.
Here's a mistake i made. I was trying to bandsaw off the waste of the handles, and managed to bump the opposite side while pulling out of the cut to relieve it from another angle and it cut into that very important outer radius. well. i had to shake that one off. Mark had the right idea to just scab on a piece and redo the cut. I'll do that, but i wont be doing any more bandsawing today.
There's a systematic way of "winging it" in this workshop. you reduce your problem to a few known sight lines and then set forth with your drill. it worked well for me here. Curtis emphasizes all the marginal things you can do to arrive on time with a piece. Get your angles as well as possible from the start and you don't have to oversteer when you get close. I love this approach because it makes sense to me and how i live my small life.
Rob lives in Nevada, me in Californication. We're not doing the full glue up of our chairs, but we watch and take notes from a "live" glue up. I noticed this during the undercarriage assembly exercise that curtis understands the anxiety of anticipation and somehow is able to subdue it with a warming drape of reassurance. You're good here. You wont encounter something that can't be fixed.

we won't test this observation today, since Mark's chair went together so beautifully. Curtis coached us through the glue up and it works. we just paused to take in what had occurred. A bunch of wet, wild wood was dimensioned to make a beautiful, refined piece. These chairs are "built like a tank" as curtis says. but they are so damned gossamer and light. My phrase? TITANIUM GRANDMA HUG.

arm rests from maple are pre-kerfed, but the lower spindles are cut insitu with a chisel

I finally got the outermost upper spindle holes drilled after a bit of courage (you aim in a way that makes sense but requires a bit of controlled 'winging it'. i'm happy. this chair will welcome sarah and me to the desk in our guest bedroom/library. it's a gossamer hug from TITANIUM GRANDMA. this chair is stronger than you'd think because it's derived from straight grained white oak and maple. it's the chair to use as a shield for getting out of a bar browl. it is a chair to hide under in an earthquake. it's a chair that i hope to die in if it's not the bed i made. (presuming there will be any remains when i die).
Rob and I went to a U-Haul outlet to get some packing material for return to our homes. We got a small wardrobe style box and cut it down and used some bubble wrap and extra cardboard to hopefully provide safe passage for assembly on our return. I'm just fitting my chair here, it will be layered in oak shavings and bubble wrap and a few prayers.

I hope to post a final assembly when i get home.