Monday, September 6, 2010
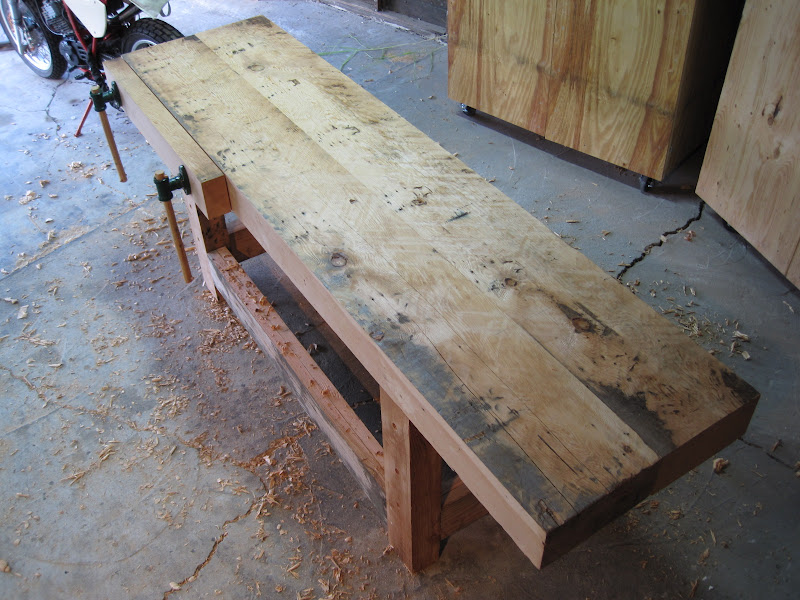
Joining the top
I saved all Saturday just for the mortises. Four inches deep, 2" wide or thereabouts. Ouch.
So I wimped out and got my trusty hand drill out with the biggest bit in my arsenal, a 1/2 incher! It went pretty quick and I could use my brace to chew out the interior and then pare away the rest with my chisels
First time I tested fitment of the legs into the mortises, they got wedged in REALLY TIGHT, and no amount of huffing could get them out. I knew I had a scissor jack in the trunk of our car, but in a fit of laziness located a two boards near by, and FORSOOTH, a FIRST CLASS LEVER was born!
it actually worked pretty well, I could lift the trestle up, shove a couple boards under the tennon shoulders on one end, and then creep the other side up in a similar manner. I only had to do this about 57 times before the fit was working.
The next step was to figure out how to drill in a reasonably accurate way. A couple years ago in a stupor of inaccuracy, I grabbed a doweling jig at the local hardware store. These things are absolute junk for doweling, but the one I had had a nice metal index for the drill bits that I remembered. So I harvested it from the jig assembly and clamped it to the walls of my benchtop like so. Worked pretty well, and I was able to then use the same approach to place the holes for the tennons with a tad of offset in a reasonably predictable manner:
After attaching the legs, it was time to flip it over onto its feet.
Sarah implored me to wait for some house guests to arrive to help with lifting this thing (we were going out to dinner this evening). But I couldn't wait for them, and I could not lift the thing on my own. So I decided to use my dolly like so as a second class lever:
And I was able to get the bench on its side pretty easily like this:
Pause to drill some 3/4" holes for work holding pegs to support material during edge work.
trestle part 2
I had planned on using draw bored pegs to provide the tension necessary to hold the long stretchers in place when building the trestle. However my capability to precisely locate an offset hole in a tenon is not up to the job
So I decided to just tack a couple cleats to the inside of the stretchers for a board that could act as a clamping bridge to hold my glue job together. I'd then just drill and peg the joints as I had done previously
The trestle ended up pretty square so I wasn't too disappointed, but I'd have to come up with a different strategy if I wanted to use drawboring for the top.
Thursday, September 2, 2010
trestle part 1
Well, OK then! Now that the legs are cut to length, time to put the stretchers together.
I'm making the stretchers out of, GET THIS, reclaimed 2x10's I found at the architectural salvage site. some were reasonably straight but had some cup and wind in them that needed to be attended to. I first ripped them down to 6" wide with my skillsaw trick, and roughed them to flat with my scrub plane, then finished with a jack plane. The scrub plane got a lot of miles in today
I've mapped out the joints into the legs to look kind of like so: 1,1/4" thick tennons, 2" deep:
The stretchers will consist of a lamination of the above boards, looking like so:
I based the dimensions on how the legs lay up against the edges of the bottom of the top here. The critical one to measure out here is the tennon shoulder of the outside part of the stretcher lamination. It's close, but of course not perfect.
I'll have to fiddlefart a bit to get the two ends of the trestle close before mortising and drawboring. But my plan is to get the ends fitted and glued up first, and then I'll be able to have them set up for the more awkward fitment of the longer stretchers later. Make sense?
Back to the mortising! eeks, even with a 1,1/4 auger bit, bashing away 6”x1,1/4”x2” deep mortises is a workout. I don’t do them much so it’s good practice.
Doug fir seems to get harder with age, or rather the the late summer, slow growing part of the rings seems to get harder. Here, the ossified rings feel almost crystalline against the chissel.
after a lot of shoulder pairing (I should have been a bit more careful with the shoulder cutting in the first plae), the joints close up fairly well. The gap-filing capabilities of Titebond III will be explored here.
I did NOT drawbore these pegs since I have a wide enough clamp to hold the end pieces together.
The second pair of legs went together much like the first, but now I had something to build them off which helped with making the alignment decisions.
OK it’s now time to stitch the two lateral sections together with some beefy stretchers.
Once the end assemblies were finished, I went for the long stretchers, but before laminating them up, I clamped the boards up to the base to mark off the tennon shoulders like so:
Then, after marking and cutting the shoulders, and then laminating the stretchers, i tested fitment of the assembly like so, note the temporary cleats I screwed onto the tennons to hold the clamps in tension. worked okay but was awkward with only one pair of hands. I think Rube Goldberg would approve:
Monday, August 23, 2010
sorting out the legs
Here's how the legs will be spaced, overall height will be about 33" tall so that I can get over the bench planes when working the wood. The legs here will have 4" long tenons draw-bored directly into the top like so:
I'll offset the shoulders such that there's 1,1/2" clearance on the outside, and 1/2" on the inside like this:
Wednesday, August 18, 2010
face vice install
time to get this twinscrew vice in place. Most designs i've seen have tabs cantilevered off of the bottom of the benchtop which accept the large threaded nuts for the screws. Your vice chop then is wide enough to attach at these lower points but still be flush with the top surface of the bench. In my case, with a 5,1/2" thick top, I was facing quite a wide chop. I didn't like the potential wracking that would happen to the vice if I was clamping small material...
...plus I wanted to use this last piece of wood from the original beam, which would only be the thickness of the bench itself. So I decided to plunge the vice screws deep into the underside of the bench such that they protruded from the middle.
layout looks as follows:
I then went crazy with a 1,1/4" auger bit to bore out as much material as possible
Making these deep trenches to relive the vice screw had me a little concerned about compromising the bench's strength. Originally I planned to cut the sides of a deep groove all the way across the width of the underside with my skill saw, which would have been much easier to beaver out the waste than boring with a 6" brace. But I figured it would be stronger if I could leave some of the full thickness of the bench intact, and only relieve that part that had to accommodate the screw. it actually didn't take that long to rough out:
I then made two wooden holders for the nuts that sink into the recess like so:
After fiddling a bit to get the nuts properly oriented in their recesses, here's how it looks all bolted up from underneath
I then flipped everything over and roughed out some handles
and here's the first test drive, it holds really well, don't have to apply much torque to the screws to hold this 2x4.
I kind of like working at this height, really low to the floor makes sawing with my japanese saws very easy. Might have to spend some more time rethinking my height of 34"
Tuesday, August 10, 2010
flattening the bottom of the top
Yup, spent an evening after work beavering away at the bottom surface of the top now that the glue's reasonably dry. You want this sort of flat so that the attachment of the legs/stretchers is reasonably predictable. It also provides a bounty of shavings for the litterbox of our cat Spartapuss.
First with the plane designed to remove lots of material in one swoop with its heavily radiused blade (Lee Valley makes 'em). Diagonal strokes per Schwarz et. al.
...then proceed to my Jack plane, the longest one in my small harbor of bench planes
First with the plane designed to remove lots of material in one swoop with its heavily radiused blade (Lee Valley makes 'em). Diagonal strokes per Schwarz et. al.
...then proceed to my Jack plane, the longest one in my small harbor of bench planes
Sunday, August 8, 2010
top glueup & leg dressing
after repeated checks for gaps and refitting the two sides of the top together, it finally made a strong enough fit that the boards closed up pretty well.
So now to MacBeath Hardwoods for a few more large clamps, and then a complex ordeal sorting out the glue-up dance, which amounted to playing the game of jenga underneath each beam for a couple hours, but finally it's pressed tightly and drying here:
With that done, time to concentrate on cleaning up the two legs I cut earlier from the smaller length of beam. Takes some doing but still had some of the patina from the beam's original use left over. A few framing hammer dents here, some nail holes that have stained the wood from the rust there:
Tuesday, August 3, 2010
edge jointing top
Now the delicate act of edge joining these two beefy beams. hoo boy. watch your toes, this is 98" x 24" x 5,1/2" of WATCH YOUR TOES AND FINGERS.
Monday, August 2, 2010
benchwork begins in earnest
I begin with milling the beam. Had 2 8' sections for the bench top and some left over to attempt to rip for a few sturdy legs. ripping by handsaw is futile at this width so I made a couple increasing depth passes using the skill saw pete "gave" me. worked okay but i hope he doesn't see this as I'm sure the motor of got fairly cooked from it all.
The Skillsaw blade does not fully reach 1/2 the depth of the material, so after flipping the beam over, I will make a matching cut and then finish off the remainder with my ryoba. not too much fuss
Next came the 8 footers. same dance with ripping the wood to width and getting rid of that crown on the edge
Now the precision step of the operation (?). Cleaning up the edges of the beams for lamination. Just don't be in too much a hurry and keep the plane blades sharp...
Sunday, May 23, 2010
A HUGE beam
Been eyein' a wonderful old timber at the architectural salvage site that i pick through on my lunch hour near work most of the winter. Kept thinking it would make an old European style woodworking bench top with its heft.
Impulse and fair weather made me throw down some dosh for the sweet thing before it rotted in a pile of underachieving hippie debris. Love the bill of sale:
What kept me from an earlier rescue was mostly logistics. It's very heavy and 21 feet long.
I rented a CityCarShare truck for 90 minutes yesterday morning with a plan to break the beam down into 2 8' segments with a remainder left over for some other project. That short candle is smeared across the face of my Ryoba blade for smooth operation. thing cut though the beam in short order, leaving a few AM crustaceans picking over architectural debris incredulous.
I'm quite sore today after getting them to sanctuary here inside the pleasing compound. Rain in the forecast, so need to get them in the garage soon. They need to dry out for a while, but the plan is to have the two 8' sections laminated together for the bench top. While I was at the salvage yard, I also found these two old growth timbers on the top of the stack which could form the legs for the bench. We'll see.
Saturday, April 24, 2010
Wednesday, April 21, 2010
Saturday, February 13, 2010
Ratka's Sewing caddy finished
Gratuitous photos
A gap exists between the frame and the base of the sewing machine on the right there to allow for the power cord.
I included a little bubingawood letter opener attached to the roof here as a joke, we'll see when she notices it, hehehe
A gap exists between the frame and the base of the sewing machine on the right there to allow for the power cord.
I included a little bubingawood letter opener attached to the roof here as a joke, we'll see when she notices it, hehehe
Subscribe to:
Posts
(
Atom
)