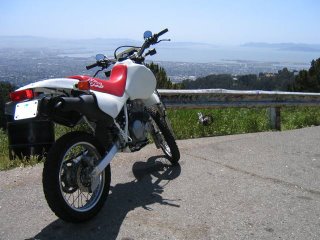
I should have a little shield between the headlight and the tachometer's body for a little bug protection at speed. Plus I need something that some of this ugly wire can hide behind. How about this shape?
The console is asymetrical by design; I'm not affraid to proliferate this to the bodywork. Kind of like it's giving you a sideways glance or a little knowing smirk?
P.S. fiberglass is not my only fabrication medium, but if it gets any more complex than this speedo sensor hanger, I would rather do it in something involving chemicals
Monday, June 29, 2009
Sunday, June 28, 2009
wiring tach part three
OK, well I powered up the tacho using the black ignition switch lead as advised by pop earlier. Worked fine. Then came splicing the sensor wire into the coil. I tried using the green/ground line first but no signal. Perhaps there was a signal but not the kind the tach needed? There are was a voltage setting that I had to use when calibrating the tach and in the manual it says to set it to the "hi" setting when going off the coil, so my guess is that they are expecting the pulse to come from wire to the CDI...and that was what it required! Thanks guys for sending some comments to help this thing along!
I love how the needle changes color:
wiring tach part two
OK, now for the head scratching. I could use some help here! This bike does not come with any facilities for tach output management, so I'm parsing their instructions on how to patch the sensor into my engine coil directly:
So my guess is to splice both the skinny black, and green tach lead with the "eye" terminal directly to the frame ground in the picture below. And my gut says the red should splice into the CDI line right there.
The coil installation schematic is in the lower right of this page from the manual. When I first read this, it sounded like I should patch the red tach lead into the green/ground lead of the coil because it has a (-) insignia at the terminal on the coil...but that just doesn't make any sense to me!
The bike's wiring diagram is fairly simple as far as these things go.
Below is a table of the various connections to the meter's body. The 10 element array is the one I'm concerned with.
Aside from the +/- leads coming from the tach sensor at the coil which we went over at the beginning, there are 3 other leads attaching here that I need to safely incorporate into the bike's harness somehow:
Curiously, I tried connecting the "+12 Volts Battery" line to the brown line in my bike's wiring harness, thinking it the tach could use the same line that my tail light uses (which switches on with my ignition key). THAT seems to work okay in that the tach powers on only when the ignition is turned on, no idea if I'm overloading my circuit insodoing...presumably the tach doesn't draw that much power tho ???
Oh well, thanks for reading through this for me. If you have any ideas I'd love to hear them. I look at the map on the upper right corner of this window tracking the visitors and wonder what you all are up to?
If you wish to connect the ignition coil, the SPA tacho is fully protected. It will connect to any coil including magneto's and is not damaged by reverse polarity. Connect black to chassis, and red to the ignition pulse side of the coil. Do not make any kind of connection to the HT leads or the spark plugs, this voltage is highly destructive
So my guess is to splice both the skinny black, and green tach lead with the "eye" terminal directly to the frame ground in the picture below. And my gut says the red should splice into the CDI line right there.
The coil installation schematic is in the lower right of this page from the manual. When I first read this, it sounded like I should patch the red tach lead into the green/ground lead of the coil because it has a (-) insignia at the terminal on the coil...but that just doesn't make any sense to me!
The bike's wiring diagram is fairly simple as far as these things go.
Below is a table of the various connections to the meter's body. The 10 element array is the one I'm concerned with.
Aside from the +/- leads coming from the tach sensor at the coil which we went over at the beginning, there are 3 other leads attaching here that I need to safely incorporate into the bike's harness somehow:
- Ground was easy: I just spliced it into the same ground line used for my front turn signals.
- Red "+12 Volts Battery" lead. It has an inline fuse. I had originally spliced it into the red battery line by the ignition switch, but that made no sense because the tach's LCD lit up as soon as I connected it. Perhaps I'm supposed to use something called a "relay" to mitigate this, but I see no mention of doing so with the tach installation instructions.
- There is another red lead with a label on it: "lights on" presumably having something to do with...lights.
Curiously, I tried connecting the "+12 Volts Battery" line to the brown line in my bike's wiring harness, thinking it the tach could use the same line that my tail light uses (which switches on with my ignition key). THAT seems to work okay in that the tach powers on only when the ignition is turned on, no idea if I'm overloading my circuit insodoing...presumably the tach doesn't draw that much power tho ???
Oh well, thanks for reading through this for me. If you have any ideas I'd love to hear them. I look at the map on the upper right corner of this window tracking the visitors and wonder what you all are up to?
Saturday, June 27, 2009
thumbs up! first shakedown!
Okay, just a limp across town to a friend's afternoon barbecue, but still a real enough ride to shake it through some gears and attempt a stoppie or two (that 320mm brembo works). Still, Sarah was happy for me to have reached this point and insisted on some pictures. Well it's been 2,1/2 years. Through open heart surgery, 2 moves, shlepping parts here and there. Countless hours pondering, sketching, rebuilding, pondering more...
...And now that I'm back home, I see so much more to do. 3 miles of loose wiring needing to be trimmed out of the situation, suspension is totally out of whack, I think I ran out of clearance under the fender in back and scuffed the pipe and made an unnatural sound with the back of the license plate on a bump...but still...Face in the helmet says it all.
A little back yard burnout
Spent the morning wiring all the signal lighting gear in place. Man, I went through so many failed crimp connectors. Good thing I bought 3x more than I needed. It was good practice, I'll be revisiting this all at some point for the tacho. Dad turned me onto this coiled plastic stuff that really bundles up your loom nice and you can see it below. Since I had the harness all apart trying to figure out the turn signal logic, I took some time to clean off all that gooey tape that had been resident with the spiders since before polyps were even a twinkle in Ronald Reagan's colon.
Also took some time to affix some adhesive insulation under the tank just for a little more peace of mind
Thursday, June 25, 2009
side panels fitted
OK, well while I was waiting for some electrical stuff to show up in the mail, continued work on the side panels. They were kind of a fuss but I like 'em well enough now that they're in place.
Here I'm making the splash molds from those plugs I did earlier
Then I did a quick layup of the parts that you see demolded here, you can see the boogers along the edges. I'm not too particular about this...sidepanels get scuffed up pretty well no matter what. I think I need to put a sticker or two on them. Probably a SIDEBURN logo :)
To mount them up, I made hollow "pegs" from a tubular layup around some foam. When the tube dried, I chopped the sections up and then glued to another fiberglass layup, placing some washers so that there would be something for the mounting bolts to interface with. On the touching side, I'll apply some bicycle inner tube rubber so that there's some vibration dampening
Here, I'm gluing up the pegs to the back of the panels
After the tacking glue set, I removed the panels and applied a bit more reinforcement. The black tips are a few layers of bicycle inner tube that were glued together and then onto the pegs using barge contact cement. It all cleans up well with a bit of hot Dremel action:
Here's how they are mounted up to the bike. I got some adhesive insulating stuff from Pegasus Auto Racing that I'll apply to the right side eventually.
P.S.I used an angle grinder to clean up neoprene of the saddle foam; it looks a bit smoother now on the edges. Peter lent me the angle grinder. It's a great tool, he has six of them because his father in law is insane and keeps giving him spares. I think I'll do well if I have one for each hand, Pete!
Sunday, June 14, 2009
rent 'dust to glory'
awesome documentary of baja 1000...I think this might have been one of the last years before Honda moved to the oversquare 450 mill. I see a lot of early 2000 XR650R's around here that are plated and man, I wish I had one before California made it impossible to license dirtbikes for road:
Saturday, June 13, 2009
on chain slack
Joel and I had a good exchange on chain slack earlier and I felt it needs a bonafide post with some hopefully clearer pictures to see how things look.
For review, here's what the system looks like with the stock dogbone connecting link (nevermind the blue tiedown, it's not compressing anything yet):
When I measure the chain slack, it's at about 1,1/4", the tight side of the manual's spec of 1,1/4 to 1,5/8".
Here's what I look like with my 1" lowering link (the gold member -- hehe):
Here's what it looks like with the pivot in line with the axes
And here is how much play is left over when everything is in line under light pressure with my finger:
Everyone says it's better to be a little loose than too tight and I agree. My question is whether this is too tight still.
And here's the unnerving part. If I had another link in the chain I would have some elbow room but this is awfully close. Tires do weird things sometimes, and this is less than 1/8"
Thursday, June 11, 2009
Firrrrrst SIDEBUUUUUUUUURN!!!!!
HEY! well as luck would have it, diddling with the air mixture screw actually made a difference. I tell you, it's such a little thing, you'd never think. But I imagine because I have this homegrown airbox and pod filter setup, plus the report of the head and new exhaust, that you just can't go with the stock 2 turns out and expect it to work. I backed the screw out to 3 whole turns after starting and could tell that it was making a difference. My intuition said it would idle okay once the choke was off and it did. However I did recalibrate the idle as it had been set for when the fuel enrichener was switched on, which is too low when switched over to the pilot circuit.
Anyway, I was too giddy to not take it out for a quick spin up and down the street so I strapped on my helmet and leaped out into the street...luckily nothing horrible happened in the ensuing runs up and down the block --- just through 1st and 2nd. Jesus, the rear sprocket only has half it's mounting bolts attaching it to the hub. Banke must have left them in the bits box somewhere, i can't find them but they're easy enough to source.
My crotch-dyno says it is waaaay more oomph at the lower end than my XR650L. Just felt wheelie friendly. Stock 650L's are horrible off idle and even when uncorked, they don't ever yield an assured PULL when throttle is rolled on. With my hamfisted tuning, it seems like this bike's gonna do better than my L ever did. Sorry L:
Anyway, I couldn't resist breaking the rear wheel loose in our mulch project out back. Tried to capture the moment below, kind of like I envision a parent might take a picture and blog/facebook/twitter their baby's first turd.
Wednesday, June 10, 2009
straight to video
OK! Well I yanked off 1/2 the discs from the supertrapp. Also backed the fuel-air mixture screw out 2,1/2 turns (from 2). Here you see two vids below, the cold start just to prove it starts after a day of rest, and then a few minutes later after it's had some time to warm up, maybe 2 minutes, I switch off the choke and directly after a backfire (cough) with a puff of smoke. Curiously it won't restart, even with the choke on...like i startled it or something...motorcycle foreplay is a dark art when dealing with large bore thumpers: such sensitive beasts.
Now, IF there was an air leak, I would imagine that the idle would be surging much more than it is, even with the starter enrichener engaged, right?
Maybe something else is awry here.
Here you see it die and me go at it with the kickstart. Yes, I strap those lineman's boots on every time. Doing it with flip-flops would ravage even the heartiest Barbarian size 13.
Monday, June 8, 2009
third start
OK, So got eberyting back together after yesterday's carb-cleansing! Re-recalled the lovely lovelies on how to reattach the throttle cables, etc back together. No hating: You can't have a tight little motorcycle without having the bits-n-pieces kind of close.
Anyway, I noticed something funny about my feeler gauge on the way to following Herr Joel's (aka Groundhog, aka ZombieStomp) recommendation to check the valve clearance. the .002" strip looked unused. You can tell they've been used because they get kind of bent and abused in order to reach into the valve ports threaded into the rockerbox cover. Which meant I couldn't have had my intake valves adjusted properly. 0.004" exhaust. 0.002" intake. OK! Well rechecked the exhaust and they looked okay. I checked the intake and they were too loose. Too loose because I was able to pass a 0.003" feeler through the tappets. So I carefully made it possible to cinch up that last 0.001" and crossed my fingers.
Started first kick just fine and sat there idling with the choke on while I called Dad so that he could hear the engine over the phone. Damn hot however. The header completely discolored and had some blueing proximal to the exhaust manifold. Few minutes and then a backfire and some smoke. I don't ahve a screen in the airbox so sometimes the flames puff out into the filter which is not good and why I got the fire extinguisher in the first place. Time to shut off and hope nothing bursts into flames. Plastic gas tanks don't do so well against fire, nor do airboxes or all the other fiberglass shit I've made. Damn it's hot. Hope it settles but at least it seems promising on try number three:
second start
Restarted the bike again yesterday and managed to verify while running that oil was indeed flowing (gushing) out the head feed line so that was a good sign that the life juice is getting where it ought to.
Still, the thing felt a LOT hotter than what I recall my 650L got in the minute or two that it was idling on it's own in that time. and then as I was backing it out of the garage to go do some DOT approved test runs up and down the street, engine died and would not come back to life.
First thought was: carbs might have a booger in the idle circuit. Since the thing wasn't going to be doing anything for an hour anyway I decided to yank the carb assy (Forgot how much fun that was!) and just give everything a once over since it had been sitting for so long...all those seals hate drying out with no gasoline running through. This time was much easier because I replaced every OEM phillips screw with an equivalent stainless allen head in the rebuild. This turned a screwdriver and four-letter-word shouting afternoon into a non-event: an old lady's fart out on a windy Manhattan street would have proved a greater interruption.
Everything looked okay inside the carbs, altho I did see a little residue in the pilot jet -- likely because I made the mistake of running dirty gasoline from the original bike thru the carb when I started it back in '07...dumb. Still not something I'd expect to cause the bike to die like this.
Somewhere after I was too committed to yanking the carbs, I recalled that the valve clearance could definitely be an issue from the forums and most recently here. Then Joel, the XL600 Whisperer, chimes in here from my previous post
Will check those valves tonight, Joel, PROMISE! Not so sure about hte Creep part...but claims of my vulnerability are nothing new :)
Meanwhile, SIDEBURN Magazine left a nice oomph in my direction today. Funny because I just sealed an envelope for their latest issue yesterday. If you haven't checked it out, a very lovely print magazine, so always an honor to get on their radar.
Check 'em out, I personally can't wait to read about D. Mann and that builder in So. Cal, Mule:
Still, the thing felt a LOT hotter than what I recall my 650L got in the minute or two that it was idling on it's own in that time. and then as I was backing it out of the garage to go do some DOT approved test runs up and down the street, engine died and would not come back to life.
First thought was: carbs might have a booger in the idle circuit. Since the thing wasn't going to be doing anything for an hour anyway I decided to yank the carb assy (Forgot how much fun that was!) and just give everything a once over since it had been sitting for so long...all those seals hate drying out with no gasoline running through. This time was much easier because I replaced every OEM phillips screw with an equivalent stainless allen head in the rebuild. This turned a screwdriver and four-letter-word shouting afternoon into a non-event: an old lady's fart out on a windy Manhattan street would have proved a greater interruption.
Everything looked okay inside the carbs, altho I did see a little residue in the pilot jet -- likely because I made the mistake of running dirty gasoline from the original bike thru the carb when I started it back in '07...dumb. Still not something I'd expect to cause the bike to die like this.
Somewhere after I was too committed to yanking the carbs, I recalled that the valve clearance could definitely be an issue from the forums and most recently here. Then Joel, the XL600 Whisperer, chimes in here from my previous post
That's right, you'd better start it!
You adjusted the valves I'm sure. You may want to do it again. Also make sure the manual decompresor (on the right exh. valve) is adjusted right and not decompressing even a little.
Try turning the idle screw up. Way up. You can always turn it back down.
Still only runs on choke? Now look for leaks on the intake manifold. Unlit propane torch, WD40, starting fluid, you know, to see if the idle perks up any.
The reason it may not have restarted is that if you don't get it all the way warmed up to about 150 or so degrees, it is somewhere between wanting choke and not wanting it, so it is hard to start. This is made worse if the idle is set way too low. Then you try to correct that with opening the throttle, and without the right feel for doing so, it can kick back on you if you open the throttle too much. Sometimes in this confused choke/no choke situation the best thing to do, with the idle adjusted crrectly to start with, is to just turn the choke off and kick it about six times. Around the sixth kick, you may be able to apply the slightest throttle to coax it, and it should sputter right to life.
Good work, FINALLY you start it. Took you long enough, you Really Finnicky Vulnerable Creep.
Will check those valves tonight, Joel, PROMISE! Not so sure about hte Creep part...but claims of my vulnerability are nothing new :)
Meanwhile, SIDEBURN Magazine left a nice oomph in my direction today. Funny because I just sealed an envelope for their latest issue yesterday. If you haven't checked it out, a very lovely print magazine, so always an honor to get on their radar.
Check 'em out, I personally can't wait to read about D. Mann and that builder in So. Cal, Mule:
Saturday, June 6, 2009
first start
OK, Well today was the day. Went and got some conventional 10W40, a gas can, a fire extinguisher and 1/2 gal of chevron 91. Made a few last checks to make sure things were closed up that needed to be, and then filled it up with 1.5L of oil (about one liter shy of capacity but this is the manual's recipe: you top it off after it's warmed up a bit).
Anyway, it started to my complete amazement. This only after I solved the puzzle of why the carbs were both peeing fuel out all over the garage floor (I had opened the drain screws before putting her in drydock back in 2007).
Only idled with the choke on or if I had the throttle turned. Probably some adjustments necessary. My main concern was how damned hot the head/cylinder got in just a few minutes...Dad's plane engine ran hot when it was new so perhaps this is just how new iron works...
One trick the old salts at XR's Only told me about is to loosen the top banjo bolt of the oil line feeding the cylinder head while the thing is running to make sure oil is getting up there and that the pump is working...It being so hot I figured things were not getting lube. However, I couldn't operate the throttle and do this simultaneously so after a few minutes I let the bike die and checked the line out. Looked like there was some evidence of fuel flow just loosening the bolts. Will need to try while running.
Then, I tried restarting. No go. Choke, no go. Hmm. Had a terrible vomit-addled migraine headache all day today so too tired to keep kicking. Pulled the plug below. Looked a little sooty, not terrible. Probably from the few Tbs of oil I dumped in there with a syringe a couple months ago to keep it wet:
Subscribe to:
Posts
(
Atom
)